Workspaces
Version 23.4.8839
Version 23.4.8839
Workspaces
Use the Workspaces feature to isolate flows canvases. Connectors and flows that are configured in separate workspaces are held in entirely separate folders on disk, which allows a complete separation of processes for organizational purposes.
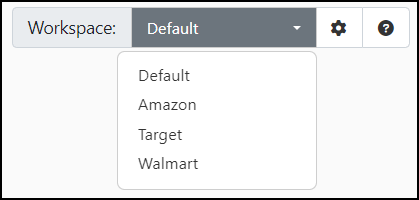
Only the connectors from one workspace are displayed at a time, so using multiple workspaces can help reduce clutter on the Flows page. For example, a single flows canvas could contain an automated trading process for each of Amazon, Target, and Walmart, but these independent flows could also be separated out into new workspaces, as shown in the following image:
Connectors in one workspace cannot be connected to connectors from a different workspace.
The Activity page collects and displays data across all workspaces. You can filter by workspace name on the Messages and Transactions tabs, but workspaces are treated as functionally the same for application monitoring and management.
Default Workspace
Arc includes a special Default workspace that you cannot delete. You are not required to use multiple workspaces because you can configure all flows in the default workspace.
The default workspace stores all of the application data files and configuration files in a data folder in the Application Directory. The data and configuration files for any other workspaces are held in a workspaces folder in the Application Directory.
Managing Workspaces
Click the gear-shaped icon at the top right of the Flows page to manage your workspaces. You have four options:
- To create a new workspace, select Create Workspace and supply a name. The application generates a fresh flows canvas with that name.
- To delete a workspace, open the canvas you want to remove, then select Delete Workspace. Remember that you cannot delete the Default workspace.
- To import a workspace from another Arc instance, select Import Workspace. Navigate to the .arcflow file you want to import and choose Open. Click Next to set your workspace import options, then click Next to check for conflicts and to complete the import. See Setting Import Options and Resolving Import Conflicts for details.
- To export a workspace that can be imported into another Arc instance, select Export Workspace. Set your export preferences, then click Export to create the .arcflow file. See Setting Export Options for details.
Workspace Actions
The vertical toolbar on the right side of each workspace includes a set of actions you can use to manage your workspaces:
 Auto-format and lay out the entire flow canvas. If you select multiple connectors in the workspace, use this to auto-format just the selected connectors. See below for instructions on how to select multiple connectors.
 Restore a previously undone layout on the canvas.
 Undo your most recent auto-format action.
 Save the current workspace view.
 Select multiple connectors. Click and drag the multi-select cursor to create a box containing all the connectors you want, then release the cursor. Use this option to auto-format the selected connectors, or to export connectors in a flow.
 Reset the canvas to its original position.