Settings Page
Version 23.4.8839
Version 23.4.8839
Settings Page
The Settings page contains global settings and user management tools. To launch the page, click the cog icon (![]() ) on the top right of the application.
) on the top right of the application.
User Management and Roles
The Users tab contains a table of the users that are authorized to access the application. This table displays the credentials, roles, and status for each user. Use this tab to add users, change a user’s status, or manage their permissions and auth tokens.
The Roles tab displays a table of all roles in the application, including the three built-in roles and all custom roles. From here you can define additional roles and the policies that make up those roles, and assign users to roles. A policy is a set of permissions that determine exactly how users can interact with the application.
For more information, see User Management and Roles.
Certificates
The Certificates tab displays a list of all certificates that are created, used, and managed by the application. You can use this tab as a reference to quickly determine which certificates are in use by which connectors in the flow.
Note: The Certificates tab is available only at the Professional and Enterprise license tiers.
Alerts
On the Alerts tab, you can configure options to send alerts when application errors occur.
The Alerts section of the page enables you to toggle alerting options, including sending emails about errors and status reports. If you use the .NET edition, you can also choose to log error messages to the Windows Application Event log.
Syslog Settings contains option for sending application logs to an external syslog server. If you enable this option, use the fields to specify the remote host connection settings.
If you enable email alerts or status reports, use the fields in Email Settings to configure the email recipients, subject lines, and SMTP authentication options.
Custom Alerts
You can send a custom alert based on a specific condition when a message is processing. To do this, add the Notify connector to your flow and configure it to notify you when a message is received by that connector. See Notify connector for more information.
Admin API
The Admin API tab covers three types of Arc configuration options.
Trusted IP Addresses
Use this section to define the IP addresses that are authorized to manage CData Arc via the Admin API. By default, only the local machine hosting Arc is permitted access to the Admin API.
The following functions are available in the Trusted IP Addresses section:
- Add Opens a modal to enter a new IP address range.
- Edit Opens a modal to modify the selected IP address range.
- Delete Deletes the selected IP address range from the list.
The following restrictions apply to this feature:
localhostcannot be modified or removed from the list.- Any IP addresses outside of the defined ranges are rejected.
- Ranges are supported. For example, the entry
100.10.100.1-15indicates that IP addresses between100.10.100.1and100.10.100.15are allowed. - Classless inter-domain routing (CIDR) notation is supported. For example, the entry
100.10.100.0/24indicates that IP addresses between100.10.100.0and100.10.100.255are allowed. - Wildcard patterns are supported. For example, the entry
100.10.100.*indicates that IP addresses beginning with100.10.100are allowed.
Cross-Origin Resource Sharing (CORS)
CORS allows browser-based clients to connect to Arc. Without CORS, browser-based scripts cannot connect to Arc because of the same-origin policy enforced by the browser. This policy restricts client-side scripts and documents from loading resources outside their origin. The origin of a script consists of the protocol, host, and port. The following table describes the available CORS settings.
- Enable cross-origin resource sharing (CORS) Whether or not CORS is enabled. The rest of these options are only available when you check this box.
- Allow all domains without ‘*‘ If enabled, domain origins are not restricted to a specific list.
- Access-Control-Allow-Origin The comma-delimited list of domain origins to allow. Included as an HTTP response header.
- Access-Control-Allow-Credentials Whether or not user credentials such as cookies are allowed in cross-origin requests. Included as an HTTP response header.
- Access-Control-Allow-Methods The comma-delimited list of methods to allow. Included as an HTTP response header.
- Access-Control-Allow-Headers The comma-delimited list of headers to allow. Included as an HTTP response header.
- Access-Control-Max-Age The maximum duration (in seconds) that Access-Control response header values can be cached.
Authtoken in URL
Check this to allow the connector to pass the auth token in query string parameters for authentication.
Migration
The Migration tab enables you to perform a full import or export of your application, including all of the global application data and settings.
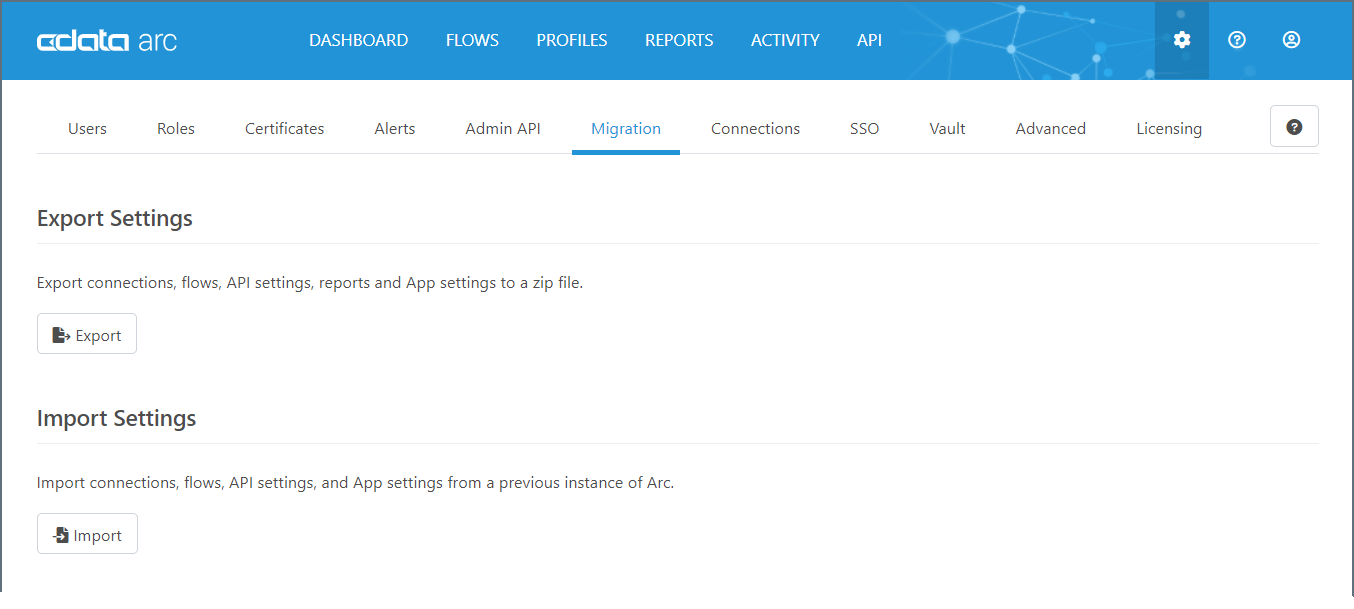
Use the Export button to export global application data. Doing so exports your data in an ARC file (.arc extension). This file type stores global application data such as multiple workspaces and settings as well as users, roles, reports, and other global data.
In a similar way, you can import application data by using the Import button to import an ARC file.
For details about how to use the Migration tab to import or export your application, see Importing and Exporting.
Connections
The Connections tab lists configured connection parameters that can be shared among multiple Arc connectors. This allows for centralized connection management and simplified configuration in individual connectors that connect to the same source using the same credentials.
To create a new share-able connection, click Add and select the connection target. The specific connection parameters vary by target, and might require OAuth redirection.
Once the shared connection is created, you can select it from the connections dropdown in connectors that support shared connections.
Single Sign-On (SSO)
The SSO tab contains settings that are necessary to link user authentication in Arc with identity providers that support OpenId, such as Azure AD.
See Single Sign-On for more information on SSO and user management.
Global Settings Vault
The Vault tab enables you to add and manage values that you can re-use throughout the Arc admin console. This feature can save time and prevent errors when configuring flows that re-use data. For more information, see Global Settings Vault.
Advanced
The Advanced tab contains the following settings.
Performance
This section allows you to define global settings for the automation service. See Architecture for more information.
Cleanup Options
Arc automatically cleans up log files at regular intervals to maximize application performance. You can specify whether to Archive or Delete the log files and set the Interval at which to delete them.
In addition, there are two checkboxes to help you manage other files in the cleanup process:
Include files in Sent folders
Instructs the application to archive/delete files that have been successfully sent in the flow. Sent files can consume large amounts of disk space. This option frees up disk space by cleaning up sent files when the log file cleanup runs.
Include files in Send folders
Instructs the application to archive/delete files that accumulate in the Input tabs of connectors. When a large number of files accumulate, the performance of the application can suffer. These files can accumulate for various reasons, including:
- A connector exceeds the maximum number of retries for a message and no error path is configured for that connector.
- The Send folder for a connector was overridden in a legacy version of Arc and pointed at a shared folder that the application could not clean up. The ability to change the Send folder and apply Send Filters is deprecated in current versions of Arc. You should use error paths instead.
Note: If you enable this feature, ensure that your connectors process files in the Send folder on a shorter interval than the cleanup interval you specify on this page. Otherwise, the application might clean up the files in the Send folder before the connectors can process them.
Proxy
This section contains global outbound proxy settings. Connectors that support an outbound proxy (such as AS3) default to these settings, but you can configure individual connectors with separate proxy settings on the Advanced tab of some other connectors (for example, FTP and SFTP).
- Proxy Type The protocol used by a proxy-based firewall.
- Proxy Host The name or IP address of a proxy-based firewall.
- Proxy Port The TCP port for a proxy-based firewall.
- Proxy User The user name to use to authenticate with a proxy-based firewall.
- Proxy Password A password used to authenticate to a proxy-based firewall.
- Authentication Scheme Leave the default None or choose from one of the following authentication schemes: Basic, Digest, Proprietary, or NTLM.
Advanced Settings
You can use this section to configure additional application settings, such as showing beta and/or deprecated connectors and setting a Local IP address. Hover over a setting for more information about what it does.
Licensing
The Licensing tab showcases your licensing information, any connector licenses you may have installed, and the version of Arc that you are currently running. You can navigate to this tab to find the number of MFT, EDI, and/or Database connectors that you are currently using, your license expiration date, and your Node ID. If you purchase a new license, you can install the license on this licensing tab using the Install New License button. To extend a trial license, please contact [email protected] with your Node ID.