Flow API
Version 22.0.8473
Version 22.0.8473
Flow API
The CData Arc Flow API enables you to create modular, single-path Arc flows and expose them as endpoints that you can query. Arc processes data that you pass to Flow API endpoints and returns the results to your querying service.
You can use Flow APIs to perform Arc workflows from external applications and services. This flexibility enables you to manage your workflows and automation using your choice of tools.
Creating a Flow API
Follow these steps to create a Flow API:
-
On the Flows page of Arc, right-click a connector and select Create API Settings.
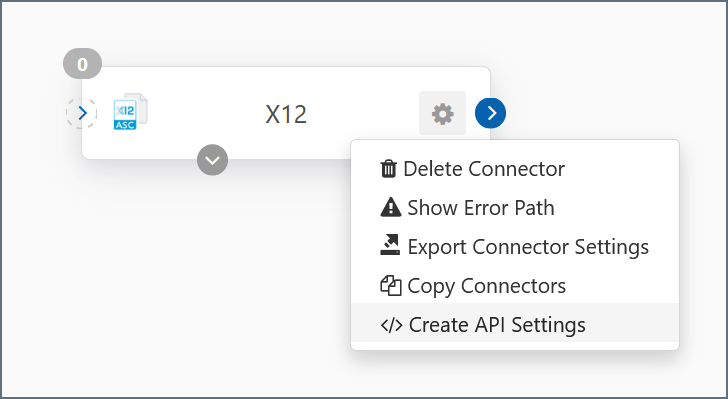
Note: Flow APIs do not currently support certain connectors. If a connector is not supported, Arc displays an error message when you attempt to add the connector to a Flow API.
-
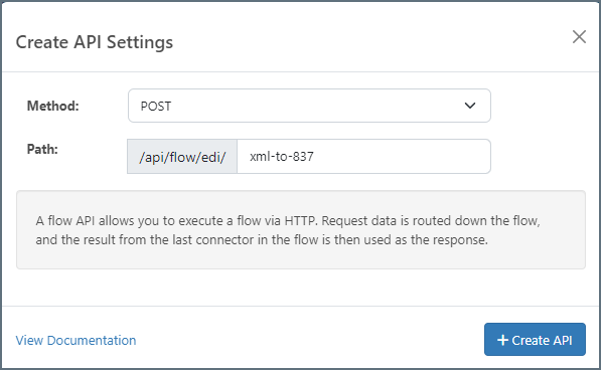
The Create API Settings modal appears. In the Method field, select the HTTP method that you want your Flow API to accept requests for. Options are GET, POST, PUT, PATCH, and DELETE. You can change this as needed after creating the Flow API.
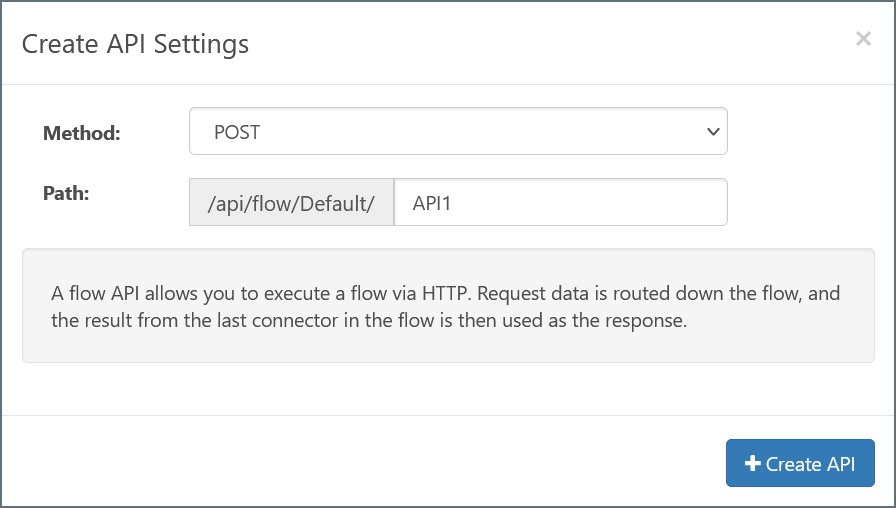
-
In the Path field, enter a name for the Flow API. You will use this name when issuing queries to the API.
Note: You can re-use API names only if they perform different functions. For example, you could have a Flow API called API_X12 that performs a POST function and a Flow API called API_X12 that performs a PATCH function, but you could not have two Flow APIs called API_x12 that both perform POST functions. -
Click Create API. Your Flow API appears in the workspace.
-
Drag additional connectors into the Flow API box and connect them together.
Note:
- The first connector in the flow API receives input data from the entity issuing the query, and the final connector sends output data back to the entity issuing the query.
- See Unsupported Connectors for a full list of connectors that cannot be used in Flow APIs.
When you finish adding and linking your connectors, you can configure and test your Flow API.
Unsupported Connectors
Connectors in a Flow API must be connected in a way that results in one output message for each input message. Connectors that process files based on schedules or external processes are not supported. As a result, the following connectors are not allowed in Flow APIs:
- API
- Copy
- Email Receive
- Form
- FTP Server
- RSS
- Schedule
- SFTP Server
- Webhook
- Workspace Receive
- Workspace Send
Example Flow API
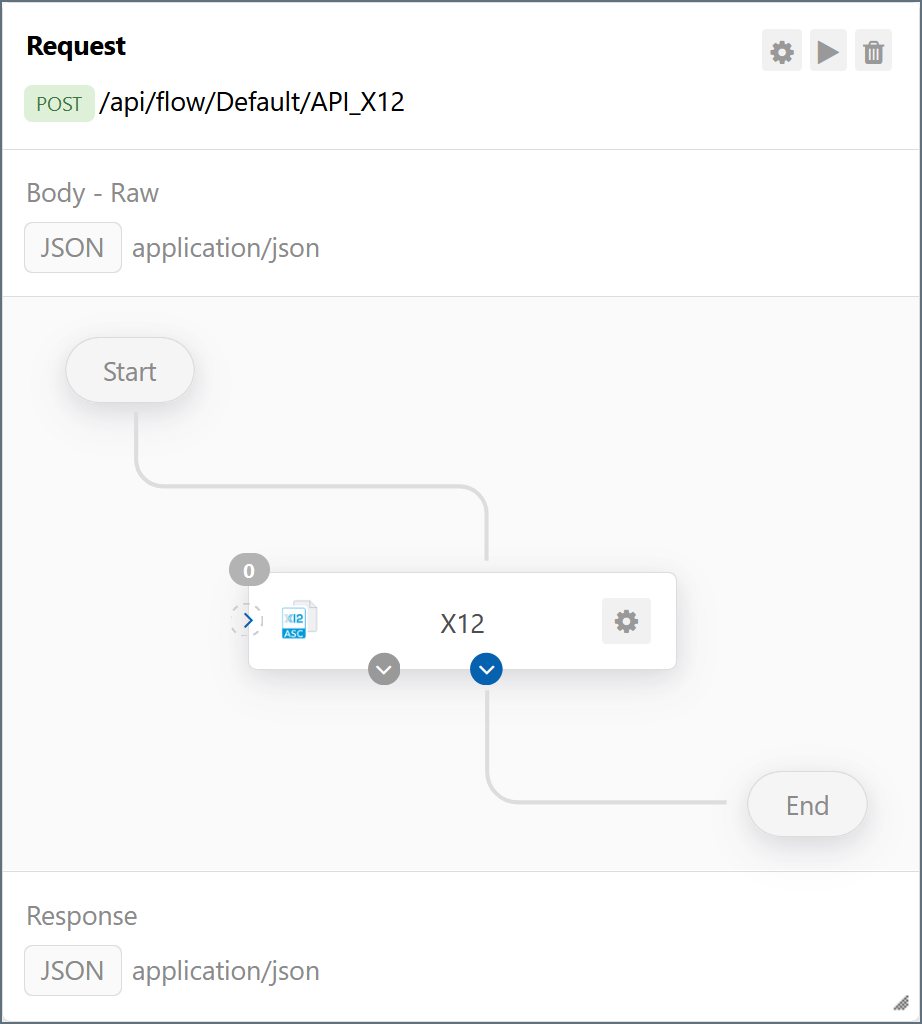
The example shown below shows a real use case for a POST-configured Flow API:
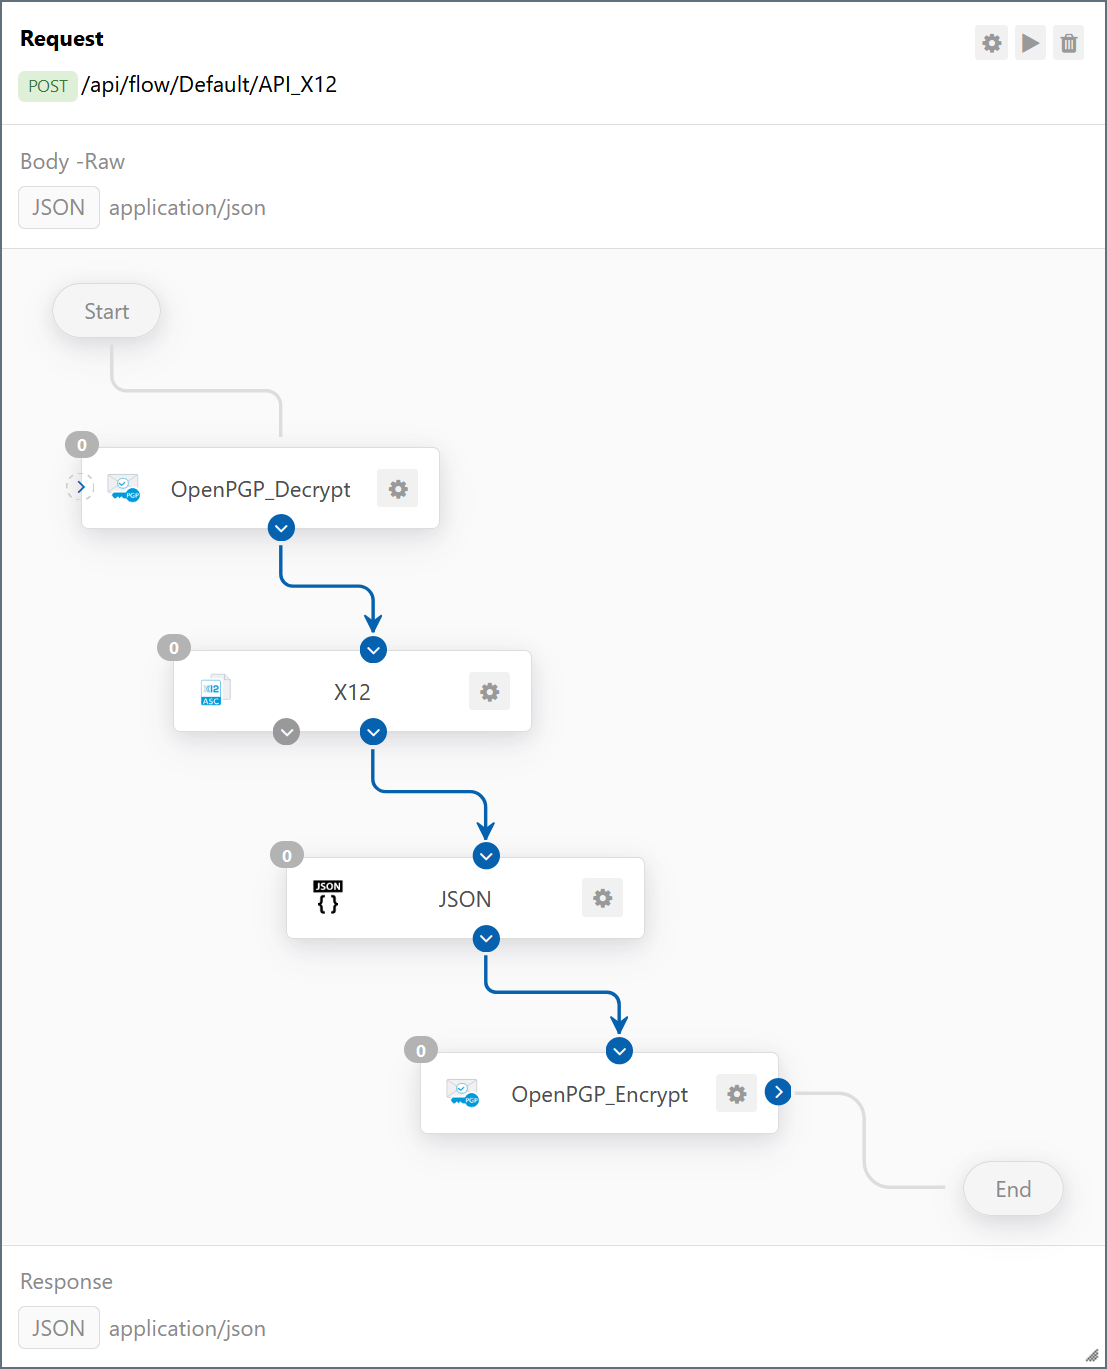
This Flow API performs the following workflow:
-
Data is received in the form of an encrypted X12 file at the Start node.
-
The OpenPGP_Decrypt connector decrypts the X12 file and passes it to the X12 connector.
-
The X12 connector translates the X12 file to XML and passes the translated XML file to the JSON connector.
-
The JSON connector converts the XML file to JSON format and passes the converted file to the OpenPGP_Encrypt connector, which encrypts the JSON file.
-
The encrypted JSON file is returned through the End node.
In this example, each connector is linked to two other connectors—one before and one after. The Start and End nodes are automatically added to the endpoints of the flow.
Configuring and Testing Flow APIs
After you create a Flow API, you can configure its settings and run sample requests to test your configuration.
Configuring Settings
Click the gear-shaped settings icon in the header of a Flow API to open the settings pane.

In this pane, you can configure the behavior of your Flow API.
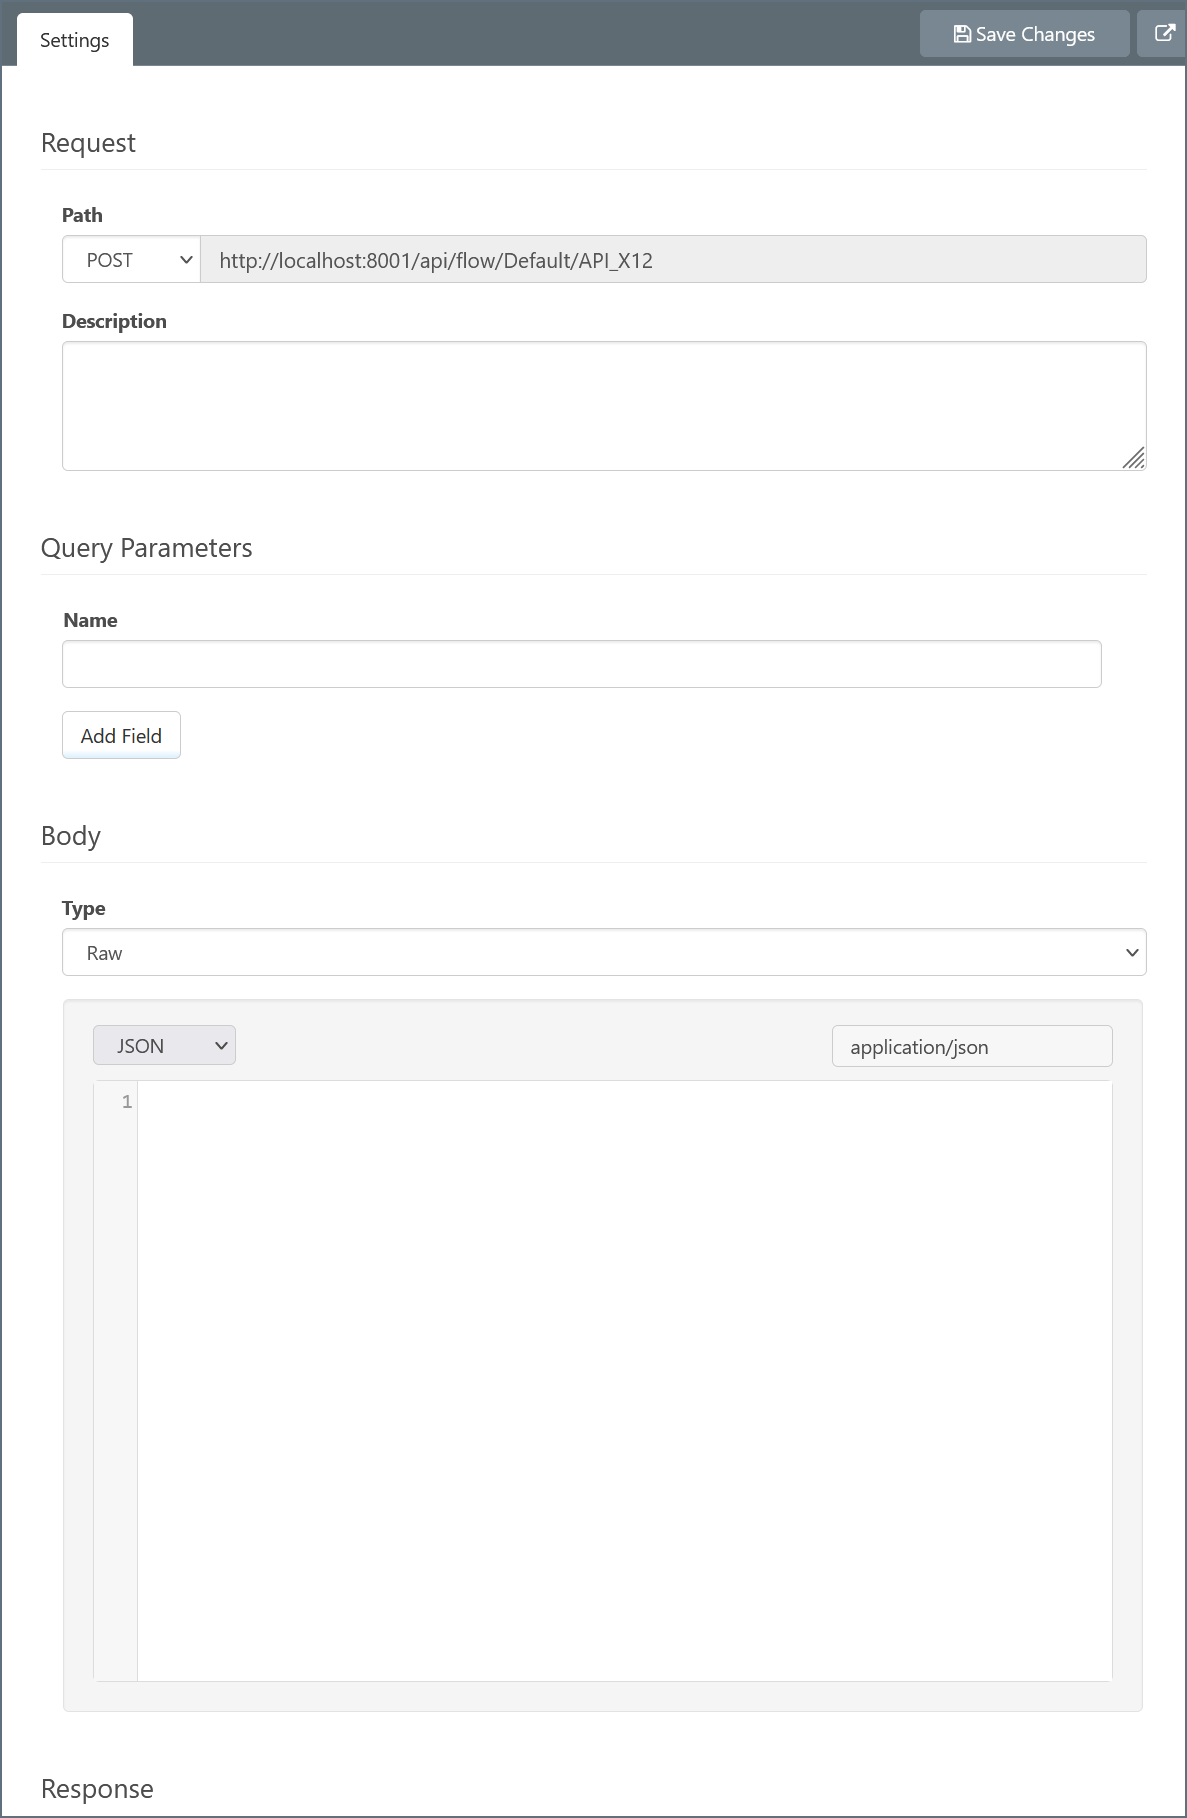
These settings are outlined in the sections below.
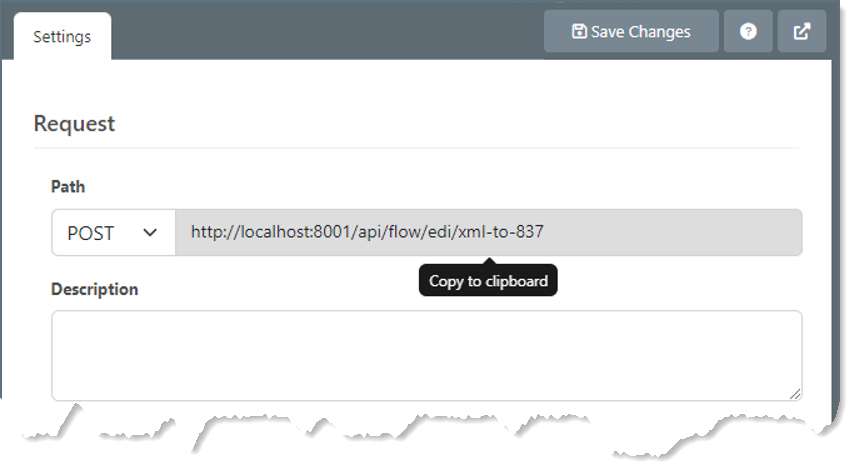
Request
In the Path field, you can select the request type for the Flow API. If you change the request type, be sure that the structure and configuration of your connectors are correct for the new request type.
The Description field provides space to enter an optional description for the Flow API. This can be useful when you have multiple Flow APIs and you want to keep track of the purpose of each one.
Query Parameters
This section enables you to specify query string parameters for the flow. If you add parameters here, they persist as metadata headers when the message passes down the flow. These headers use the prefix API-QueryParameter-, so a query string of test would use API-QueryParameter-test. This header can be seen on the Message Info modal when you select a message on the Input or Output tab of a connector, as shown in the image below:
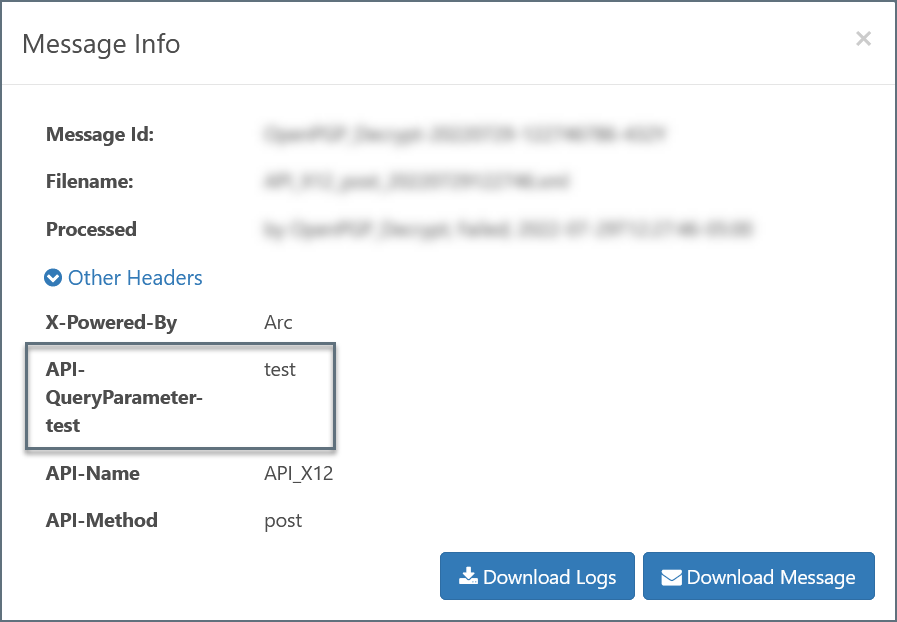
This feature can be useful if you have information that you want to pass as part of the request but the information is not part of the body. For example, if you want the ID of the most recent sales order for a specific company in a database, you can add a CompanyName query parameter to your API and reference it within the flow using the API-QueryParameter-CompanyName header.
Body and Response
In the Body section, set the Type field to the value that corresponds to the way you expect the querying client to communicate with the Flow API:
- None—no body expected with the request
- Raw—free-form data in any arbitrary format
- Form data—name-value pairs
- x-www-form-urlencoded
In the text field for Body and Response, you can use the drop-down menus to select the expected data formats for the body and response (XML, JSON, or Custom).
Testing Flow APIs
To open the Flow API testing modal, click the triangle-shaped icon in the header of the Flow API.

In the testing modal, the box on the left acts as the request, and the box on the right displays the response. Each box displays the expected data format chosen in the settings pane.
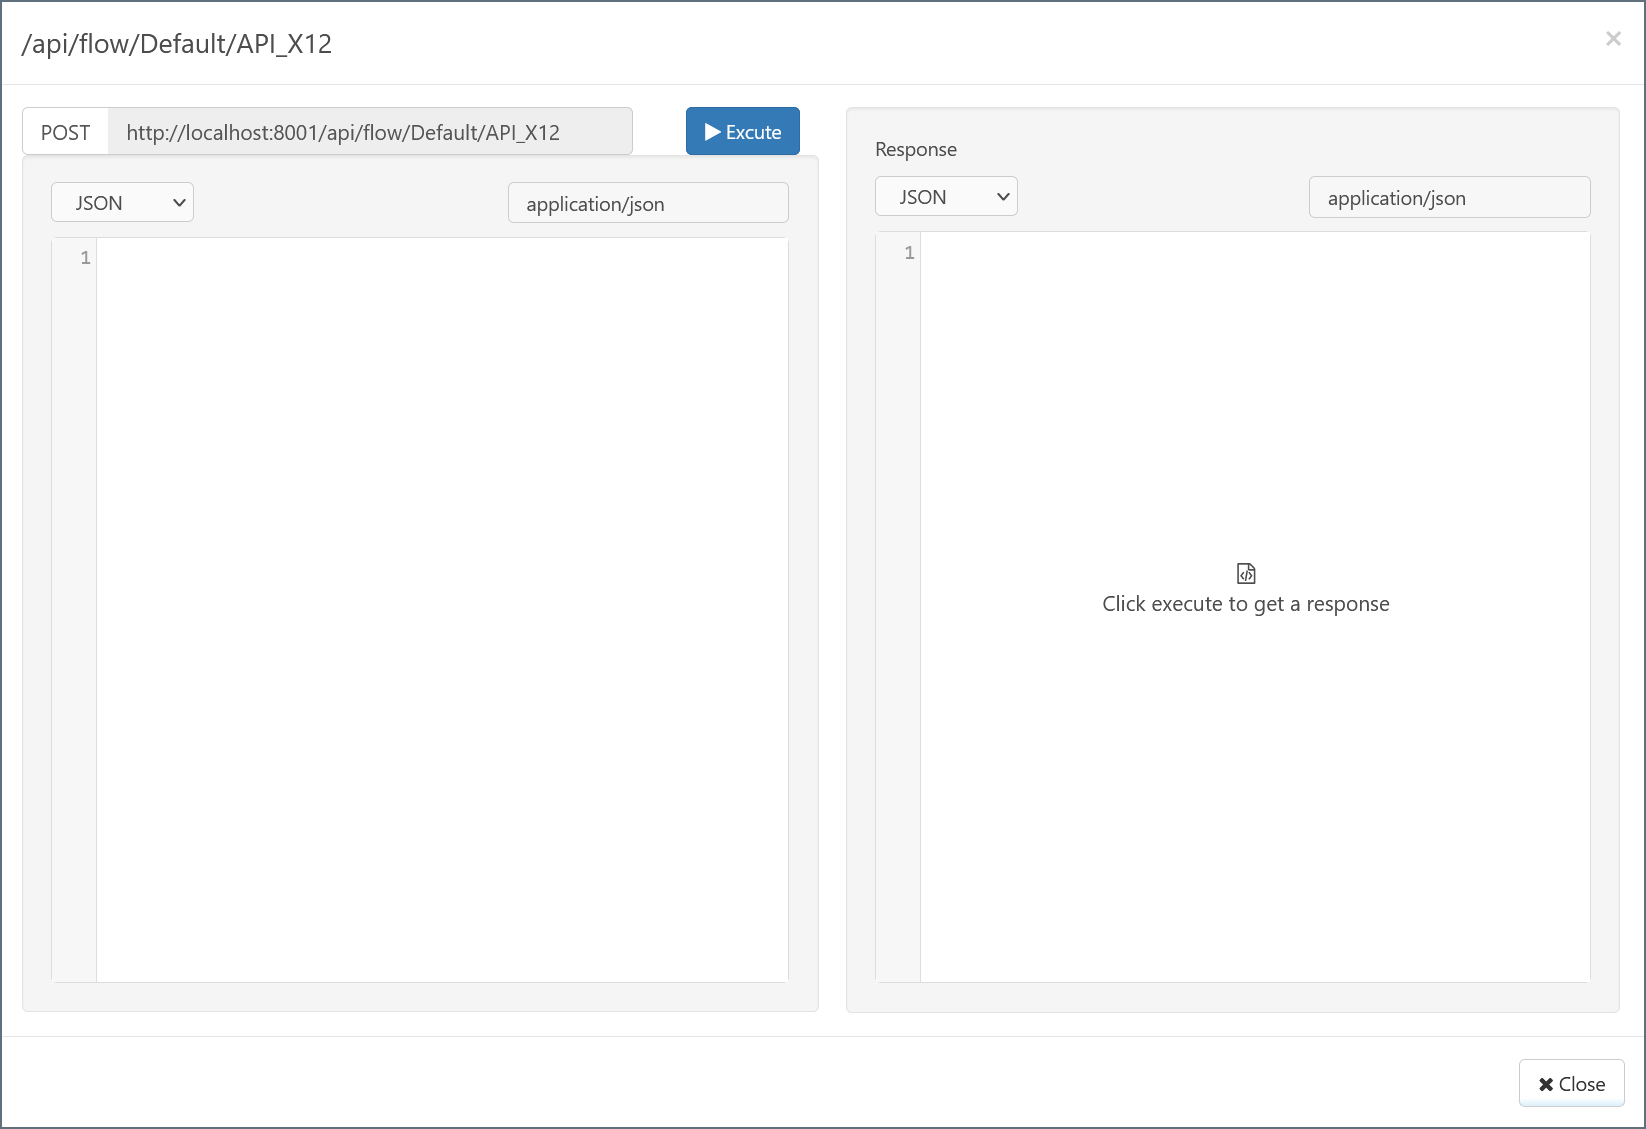
To test your Flow API, enter a test query in the box on the left and click Execute. If the response matches the expected result, your Flow API is ready to use. If the response is incorrect, check the configuration of your Flow API and the configuration of each connector in the Flow API.
Using the Flow API with an External Application
The following steps explain how to invoke the Flow API from an external client. This example shows how to execute a Flow API from Postman, but you can use any client that can send REST requests as well.
-
Select the flow that you want to expose as an API by using the Select Multiple Connectors option at the bottom right of the flow designer. Then, click Create API Settings. This action opens the Create API Settings dialog.
-
Select a method (for example, POST) as shown below, and give your API a meaningful name.
-
Click Create API to create the Flow API.
-
In the Settings pane, configure the Flow API to define the expected Content-Type value in the Body section and the Content-Type value that you want for the response in the Response section. As an option, you can provide sample data for the request and response.
-
Copy the path that appears in the Request pane, as shown below.
-
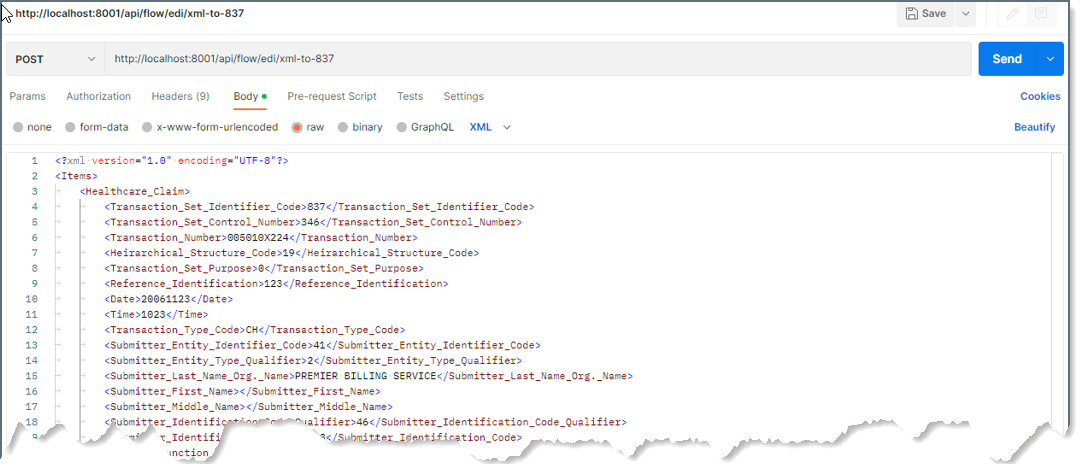
Open the Postman application. Ensure that the same content type (in this case, POST) appears in the Content-Type drop-down list. Then, paste the path that you copied in Arc (step 5) into the request URL field. Specify the body of the request as the content that should start your flow.
-
Authenticate to the Flow API. The Flow API uses the same authentication rules as the Admin API. This example uses the auth token header (x-cdata-authtoken) as the method for authenticating.
To use that method:
-
Click the Settings icon at the top right of the Arc window. Then, click Add to open the Add User dialog or to edit an existing user.
-
In the resulting dialog, select the check box API Access to display an auth token. (Copy this token to a safe place because the dialog will not be shown again. If you lose or delete your auth token, you must create a new one.) Then, click Save Changes.
-
Return to the Postman application and add the authentication credentials for the Flow API, as follows:
-
Click the Headers tab.
-
Paste x-cdata-authtoken in the Key field.
-
Paste the auth token that you copied in Arc into the Value field.
-
-
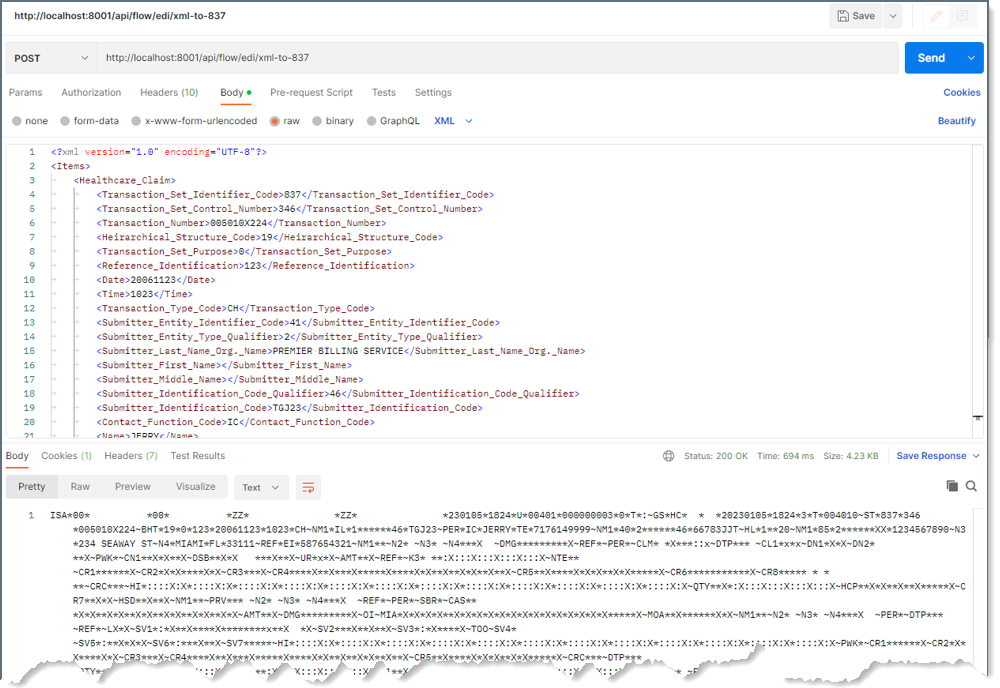
-
Click the Send button once your request is ready. Then, you should see a response to the request that you sent, as shown in the example below: