Email Send Connector
Version 22.0.8473
Version 22.0.8473
Email Send Connector
The Email Send Connector sends messages via an SMTP mail server.
Overview
An Email Send Connector connects to an SMTP server to send files as outgoing email messages. Input files processed by the connector can be sent directly as email attachments, or data can be parsed from input files and included in the outgoing message via a scripting template. For more information on creating a scripting template, please see the Templates sections.
Connector Configuration
This section contains all of the configurable connector properties.
Settings Tab
Settings for the name and description of the connector.
- Connector Id The static name of the connector. All connector-specific files are held in a folder by the same name within the Data Directory.
- Connector Description An optional field to provide free-form description of the connector and its role in the flow.
Connection
Settings for connecting to the SMTP server.
- Host The hostname or IP address of the SMTP server.
- Port The port on which to connect to the SMTP server.
- User The username credential to login to the SMTP server.
- Password The password credential to login to the SMTP server.
- TLS Type The method used to negotiate SSL/TLS when connecting to the server:
STARTTLS — A plaintext connection will be established. Afterwards, SSL/TLS can be started with an explicit command.
SSL/TLS — Negotiation will occur immediately without first establishing a plaintext connection.
None (Plain Text) — A plaintext connection will be established, and no SSL/TLS will be used.
Automatic — The connector will determine the TLS type based on the configured port number.
Message
Settings for the outgoing email message.
- To The email address(es) of the recipient(s) of the outgoing email message.
- Show From Clicking this opens a field to enter the email address of the sender of the outgoing email message. The connector will attempt to automatically determine the value for this field based on the User credential passed to the SMTP server.
- Add Cc / Add Bcc Clicking one of these opens a field to enter the email address(es) to carbon copy (CC) or blind carbon copy (BCC) on the message.
- Subject The subject line for the outgoing email message. Subjects can include dynamic data from the outgoing file. For more information, please see the Dynamic Subjects section.
- Message Type Specifies the method for handling the message:
Attachment — Send files that arrive at the connector as attachments.
Template — Interpret the message body as a scripting template that reads values from the input file. For more information on creating a scripting template, please see the Templates section.
Automation Tab
Automation Settings
- Send A toggle that instructs the connector to automatically send files when they are ready.
- Retry Interval The interval the connector will wait before retrying a failed send.
- Max Attempts The number of attempts the connector will make to send the message. Setting this value to 1 instructs the connector to only make the initial send attempt without retrying. The connector waits the duration specified by Retry Interval between each attempt.
Performance
Settings related to the allocation of resources to the connector.
- Max Workers The maximum number of worker threads that will be consumed from the threadpool to process files on this connector. If set, overrides the default setting from the Profile tab.
- Max Files The maximum number of files that will be processed by the connector each time worker threads are assigned to the connector. If set, overrides the default setting from the Profile tab.
Advanced Tab
Proxy Settings
Settings for using a proxy with the connector.
- Use Global A toggle that instructs the connector to use the proxy settings configured under the Settings tab of Arc.
- Proxy Type The type of proxy to use. Select None to not use a proxy. Otherwise, select Tunnel, SOCKS4, SOCKS5, or HTTP.
- Proxy Host The proxy server. Formatting depends on the Proxy Type selected.
- Proxy Port The port to use when connecting to the proxy.
- Proxy User The username to use when connecting to the proxy.
- Proxy Password The password for the associated username.
- Authentication Scheme The protocol to use when connecting to the proxy. Options include Basic, Digest, Proprietary, and NTLM.
Advanced Settings
Extra settings related to processing.
- Excluded Extensions A comma-delimited list of file extensions that should not be processed by the connector.
- Outgoing Server Public Certificate If the SMTP server is an SSL server, this field should be set to the SSL Certificate that identifies the server. If the server’s certificate is not available, this field can be set to ‘Any Certificate’ to implicitly trust the server’s identity.
- Processing Delay The amount of time (in seconds) that the connector will wait to process files in the Input folder.
Message
Settings that determine how the connector will search for messages and handle them after processing.
- Save to Sent Folder A toggle that instructs the connector to keep a copy of sent messages in the Sent folder.
- Sent Folder Scheme Instructs the connector to group files in the Sent folder according to the selected interval. For example, the Weekly option instructs the connector to create a new subfolder each week and store all sent files for the week in that folder. The blank setting tells the connector to save all files directly in the Sent folder. For connectors that process many transactions, using subfolders can help keep files organized and improve performance.
Logging
Settings that govern the creation and storage of logs.
- Log Level Specifies the type of information to log in the connector’s Logs directory:
- None — Does not create any logs.
- Error — Creates logs only when the connector encounters an error.
- Warning — Creates logs only when the connector issues a warning.
- Info — Logs general information about the workflow, including any errors and warnings (if applicable).
- Debug — Logs detailed debugging information for both successful and failed workflows.
- Trace — Logs detailed trace information for both successful and failed workflows.
Please note that Debug and Trace may log sensitive information including message contents and SSL certificates. Although connection properties (such as passwords) are masked, please review logs of this level for sensitive information before sharing them outside of your organization.
- Log Subfolder Scheme Instructs the connector to group files in the Logs folder according to the selected interval. For example, the Weekly option instructs the connector to create a new subfolder each week and store all logs for the week in that folder. The blank setting tells the connector to save all logs directly in the Logs folder. For connectors that process many transactions, using subfolders can help keep logs organized and improve performance.
- Log Messages A toggle that instructs the connector to save a copy of the most recent message in the Logs directory. Note that the connector only keeps one message per subfolder, and the connector overrides the previously-saved message when it runs again.
Miscellaneous
Settings for specific use cases.
- Other Settings Allows configuration of hidden connector settings in a semicolon-separated list, like
setting1=value1;setting2=value2. Normal connector use cases and functionality should not require use of these settings.
Establishing a Connection
The following fields under the Settings tab are required to establish a network-level connection to the SMTP server:
- Host
- Port
- TLS Type
Click the Test Connection button to verify that the connector can reach the server.
Once network-level connectivity has been established, the following settings are required to login to the server and begin sending emails:
- User
- Password
Sending Emails
The Message section of the connector settings determines the email message to be sent:
- If Message Type is set to Attachment, files processed by the connector will be sent as email attachments, and the body of the message should be specified in the Message Text Editor.
- If Message Type is set to Template, then the Message Text Editor is treated as an ArcScript template. In the scripting template, values can be parsed out from the files processed by the connector and included in the email body.
Templates
Setting Message Type to Template instructs the connector to interpret the message body as an ArcScript template. The template uses a simple syntax to interact with the input file and retrieve values to use in the email body. These values can be combined with static text to generate a standard body format that is dynamically populated based on the files processed by the connector.
To use Template mode, the connector must receive an XML file as an input. Templates can only parse information from XML files.
Basic Template
For an example of a template message, consider the following input XML document:
<Lead>
  <Company>ABC, Inc.</Company>
  <Email>[email protected]</Email>
  <FirstName>John</FirstName>
  <Description>Blue Widget</Description>
</Lead>
This file contains a list of attributes—Company, Email, FirstName, Description—inside of Lead tags. The ArcScript command to pass the Email field into a message would look like this:
[document.lead_email]
There are three components to this command:
- The document item, which points to the currently open file.
- The lead_email attribute, which points to ‘[email protected]’.
- Square brackets (
[]), which indicate the use of a formatter rather than literal characters.
An email body template for the above XML input file might look like this:
Hi [document.lead_firstname],

We saw that you might be interested in the following product:

[document.lead_description]

Would you like to set up a demo to learn more about how we can help you with your work at [document.lead_company]?
This message would generate the following email:
Hi John,

We saw that you might be interested in the following product:

Blue Widget

Would you like to set up a demo to learn more about how we can help you with your work at ABC, Inc.?
Please refer to the Scripting section for more information about ArcScript.
XPath Formatting
The XPath formatter (written as xpath in commands) provides an alternative approach to retrieving dynamic values from files. This approach may be more familiar to users already using ArcScript elsewhere in Arc. XPath requires input files to be XML files.
Using the same input file example as above:
<Lead>
  <Company>ABC, Inc.</Company>
  <Email>[email protected]</Email>
  <FirstName>John</FirstName>
  <Description>Blue Widget</Description>
</Lead>
The XPath command to return the email address would be:
[xpath(/Lead/Email)]
There are three components to this command:
- xpath followed by parentheses, which denotes the command as an XPath command.
- The path to the data, with each level delineated by slashes.
- Square brackets (
[]), which indicate the use of a formatter rather than literal characters.
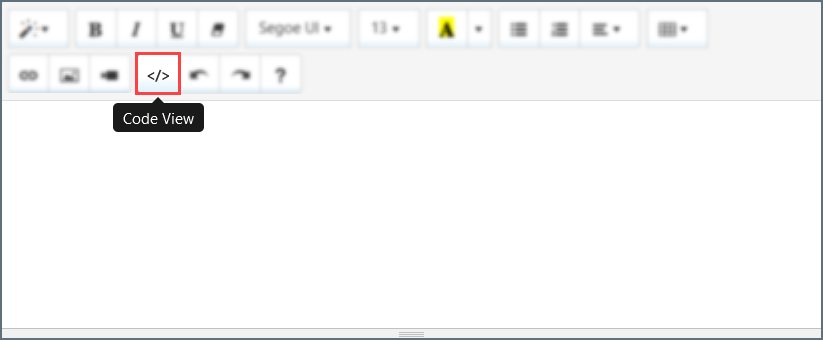
Code View Editor
The Code View editor enables the creation of custom ArcScript for advanced processing of information from XML files. To open the Code View editor, click the Code View button in the message editor.
In this mode, ArcScript commands can be used to process multiple data entries at once. The following input file example includes a list of names:
<record>
  <to>Dave</to>
  <items>
    <item>
      <first_name>James</first_name>
      <last_name>Satchel</last_name>
    </item>
    <item>
      <first_name>John</first_name>
      <last_name>Smith</last_name>
    </item>
    <item>
      <first_name>Gina</first_name>
      <last_name>Newberry</last_name>
    </item>
  </items>
</record>
The following message written in the Code View editor incorporates data from this input file using ArcScript:
Hi [document.record_to],
<br>
<br>
Here are the people you were asking about:
<br>
<br>
<arc:set attr="xml.xpath" value="/record/items/item" />
<arc:call op="xmlDOMSearch" in="xml">
  <arc:set attr="first.names" value="[xpath(first_name)]" />
  <arc:set attr="last.names" value="[xpath(last_name)]" />
  <arc:enum attr="first.names">
    [_value]
  </arc:enum>
  <arc:enum attr="last.names">
    [_value]
  </arc:enum>
  <br>
</arc:call>
This code loops over all of the first name and last name values in the input XML file and prints them in the body of the message. When run with the input file above, the final email would look like this:
Hi Dave,

Here are the people you were asking about:

James Satchel
John Smith
Gina Newberry
Please refer to the Scripting section for more information about ArcScript and custom commands.
Dynamic Subjects
The Subject field supports dynamic information from the outgoing file (for example, the filename and the connectors that have processed the file).
The file information is available through the _message item. The _message item has a collection of attributes with a ‘header:’ prefix that corresponds to each of the headers available in the outgoing file. These headers include the filename, any metadata related to processing the file within the Arc Flow, and any custom headers promoted to the file via scripting.
The _message item and the header attributes are referenced in square brackets like any other ArcScript item:
[_message.header:headerName]
For example, the Subject could be set to the following value to include the filename of the outgoing file:
[_message.header:filename]