Configuring Your First Replication Job
Version 23.4.8843
Version 23.4.8843
Configuring Your First Replication Job
After you start the server, you are ready to configure your first replication job. A replication job consists of a source connection, a destination connection, and a list of tasks. The following sections provide step-by-step instructions for creating a connection, creating a job, adding tasks, setting up your first replication job, and running the job.
Creating Connections
After you log in, you need to configure connections to the sources and destinations with which you want to work. For details about how to establish a connection to a particular source or destination, see Connections.
To create a connection, follow these steps:
-
Click Connections in the navigation bar to open the Get started by creating a connection page.
-
Click Add Connection. This action opens the Select Connectors page.
-
Select either the Sources tab or the Destinations tab, depending on which kind of connector you want to create.
-
Locate the connector that you want to add and click Configure Connection arrow that is displayed at the end of the row, as shown below:
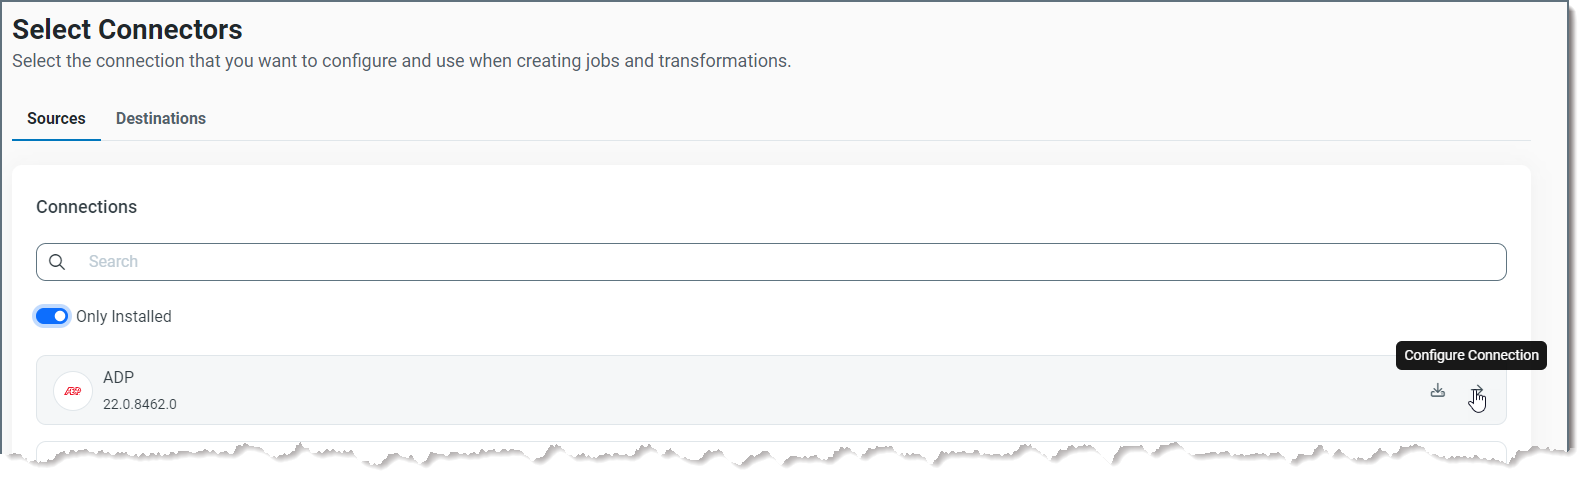
Note: If the connector that you want is not installed in your Sync bundle already, you can download the connector by following the instructions in Connections.
-
Enter settings for your connection on the Settings tab of the New Connection page:
-
Enter a name for your connection. This name is used to refer to the connection when you create a job. If you have multiple connections for the same source or destination, choose a name that describes the purpose of the connection.
-
Enter authentication details and other connection properties.
-
Define advanced connection settings on the Advanced tab. (In most cases, though, you should not need these settings.)
-
-
Click Create & Test to ensure that the connection configuration is correct. If the message if successful, Sync displays a message to that effect. If the test fails, check your configuration settings to ensure that they are correct. Then, retest the connection.
-
Click Save & Test to save the connection configuration.
Creating a New Job
After you create the connections that you need, follow these steps to create your first job.
To create a job, follow these steps:
-
Click Jobs in the navigation bar to open the Jobs page.
-
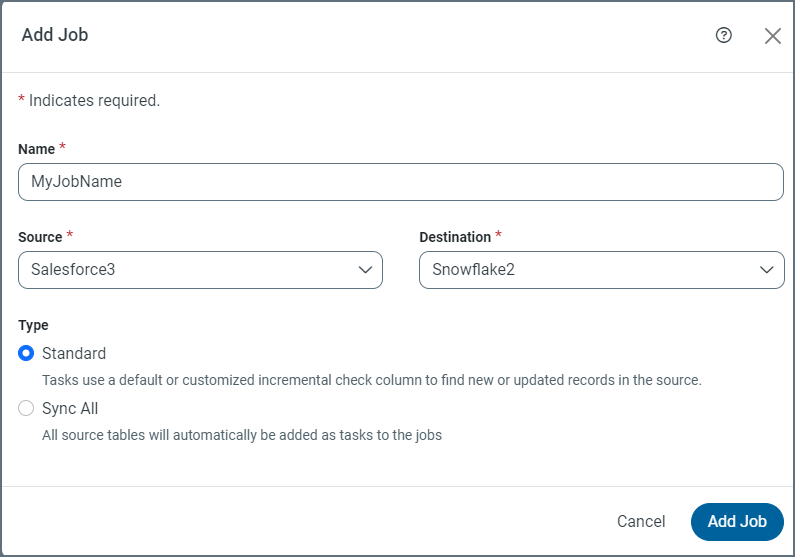
Click Add Job (upper right corner). This action opens the Add Job dialog box where you can enter job information.
-
Enter a job name and select the source and destination connections. (Note: Job names must not include illegal characters. If you use an illegal character, Sync generates an error message.)
-
Select a replication type. The default setting is Standard.
-
Standard: In a job of this type, tasks use either a default or a customized incremental check column to find new or updated records in the source.
-
Sync All: In a job of this type, all source tables are added automatically as tasks to the jobs.
-
-
Click Add Job to create your new job.
From your specific job page (Jobs > YourJobName), you can set your job to run on a schedule, set incremental replication, and create email notifications. In addition, you can view your logs and job history to obtain more information or to troubleshoot errors.
Adding a Task to a Job
After you create your job, you can add one or more tasks to it.
To add a task:
-
Select your job and click the Task tab.
-
Click Add Tasks.
-
Select the task or tasks that you want to add to your job from the table of tasks. You also can enter the name of a task in the Search field to locate a specific task.
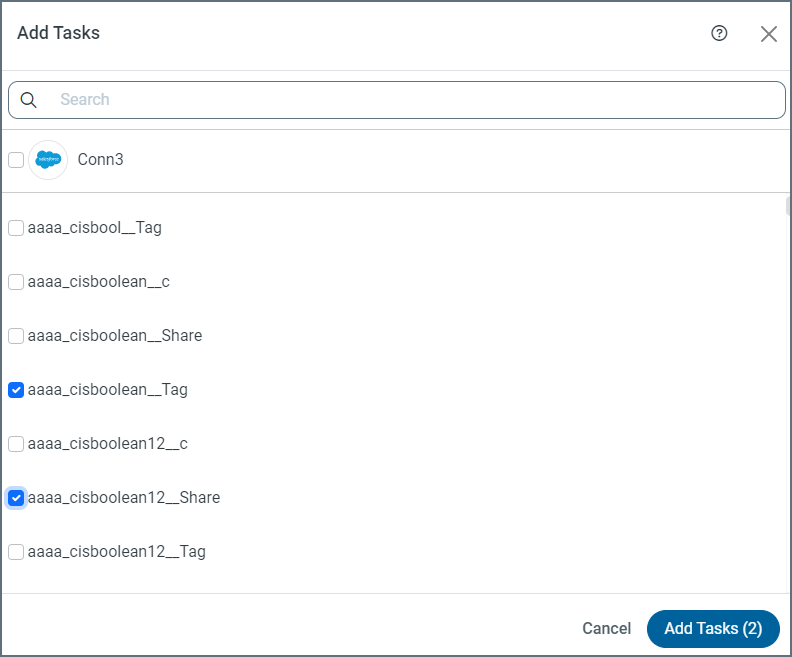
Note: To include all tasks, select the checkbox next to the job source and destination at the top of the table.
-
Click Add Tasks to add the tasks to your job.
-
Select the checkbox next to individual tasks that you want to run in your job (on the Task tab). If you want to include all tasks, select the checkbox next to the job source and destination at the top of the table.
-
Run the tasks that you want by selecting the checkboxes to the left of those tasks. Then click Run in the gray task bar that is displayed. You can also run a specific task by clicking the Run arrow at the end of the task row.
When a task runs correctly, Sync displays the message Successful appears in the Last Run column.
Defining Settings for Your Initial Replication Job
You can control how Sync processes an initial replication job by using certain settings that are available on the Overview tab that is displayed when you open a job. These settings, available by clicking Configure in the Incremental Replication category, are as follows:
-
Start Date/Start Integer: Sync begins replicating data from your source’s minimum start date or minimum integer value of the auto-increment column (that is, from the source’s earliest available records). You choose whether to set a start date or a start integer, depending on the status of the Integer-based start time setting.
-
When Integer-based start time is off, you can select a date from the Start Date field.
-
When Integer-based start time is on, the Start Date field becomes a Start Integer field in which you can enter an integer value.
Note: Some APIs do not provide a way to request the minimum date or integer value for an entity. If no minimum value is available, you can configure it manually by following these steps:
-
Open your job.
-
Click the Task tab and select a table to open the Table-Name page.
-
Click the Advanced tab.
-
Click Configure in the Incremental Replication category. This action opens the Incremental Replication dialog box.
-
Select the Override Job settings check box. This option enables you to edit the Start Date or Start Integer settings.
-
Click Save to save your changes.
-
If you do not specify a start date or an integer value, Sync executes a query on the source that obtains every record in one request. However, this process can cause problems when your source table is exceptionally large because any error that occurs causes Sync to rerun the query from the beginning of the data.
-
-
Replication Interval: Paired with Replicate Interval Unit, this setting enables you to set the time interval at which to split the data during data retrieval. Sync uses this interval to batch the updates so that if a failure occurs or if the replication job is interrupted, the next attempt starts where the last run ended. By default, Sync uses an interval of 180 days. However, you can adjust this interval larger or smaller, depending on the amount of data that you have and how dispersed the data is in terms of time.
-
Replicate Interval Unit: Paired with Replication Interval, this setting enables you to set the time interval at which to split the data during data retrieval. Accepted values are Minutes, Hours, Days, Weeks, Months, or Years.
Note: This setting is not labeled in the Incremental Replication dialog box. You set it from the drop-down menu to the right of the Replication Interval text field.
Running Your Job
The first time that you run a job, CData Sync processes the entirety of the source’s historical data. This data can encompass a huge amount of information. Therefore, Sync uses several strategies to maximize efficiency, performance, and integrity. Sync also provides user-controlled options that you can use to optimize the synchronization strategy for your specific data set. These options are explained in Setting Your Initial Replication Job.
You can run a job in either of these ways:
-
Select the checkbox to the left of the job name and click Run in the gray task bar at the top of the Jobs page.
-
Click Run Job (▷) that is displayed when you position your cursor at the end of the job row, as shown below.

-
Select the job that you want to run. Then run the job from the Tasks tab, as described in Adding a Task.
When a job runs correctly, Sync displays the message Successful in the Last Run column.