Connections
Version 26.2.9686
Version 26.2.9686
Connections
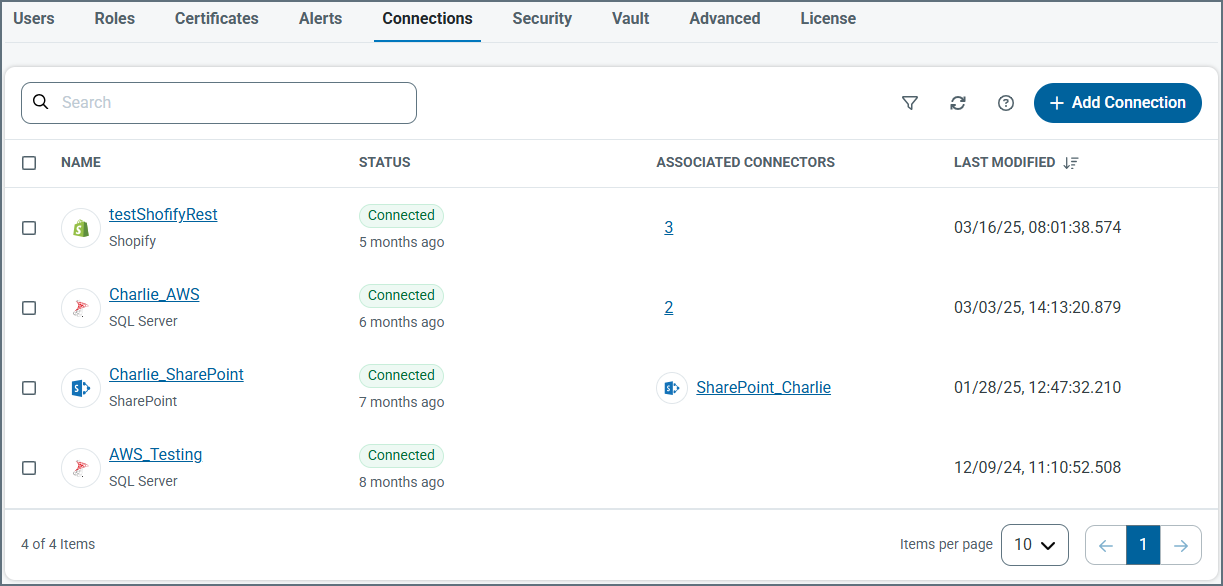
The Connections tab lists configured connection parameters that can be shared among multiple CData Arc connectors. This allows for centralized connection management and simplified configuration in individual connectors that connect to the same source using the same credentials.
Tip: It is useful to understand the difference between CData drivers and Arc connectors. The drivers provide the underlying connectivity to external systems, while connectors build on the drivers to handle data exchange, transformation, and routing within Arc. You configure the shared driver-level connection details on the Connections tab, which connectors then reference so the same connection can be reused consistently across multiple flows.
You can find documentation for the CData drivers on our website at https://www.cdata.com/kb/help/. Find the driver you want in the Drivers & Data Connectors section of the page, then click the Online Documentation link for the ADO.NET or JDBC editions. This enables you to find information on how to use the CData driver-based connectors.
Add a Connection
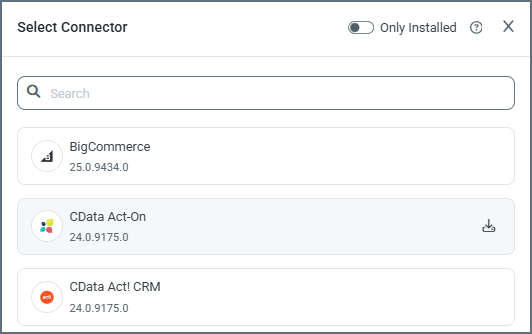
To create a new shared connection, click Add Connection and select the connection target. Arc ships CData drivers for some connectors with the application, but not all. On the Select Connector pane, if there is a download button on the connector you need (the CData Act-On connector in the following image has one), use it to download and install the driver, which enables the connector for use.
After you click the download button, the Install Connector pane opens and specifies the version number. At this point, it asks whether you want to install manually or automatically. Typically you want to install automatically. However, if CData Support has provided you with a .zip file, you can select manual, then use Choose File to supply the .zip file from them.

Notes:
- If you are installing to the .NET edition and encounter a permission error during driver installation, grant
writepermission towww\Web.Configandwww\binfor the Arc service account (Network Service by default). - If you are installing to the .NET edition, you are warned that the application must restart.
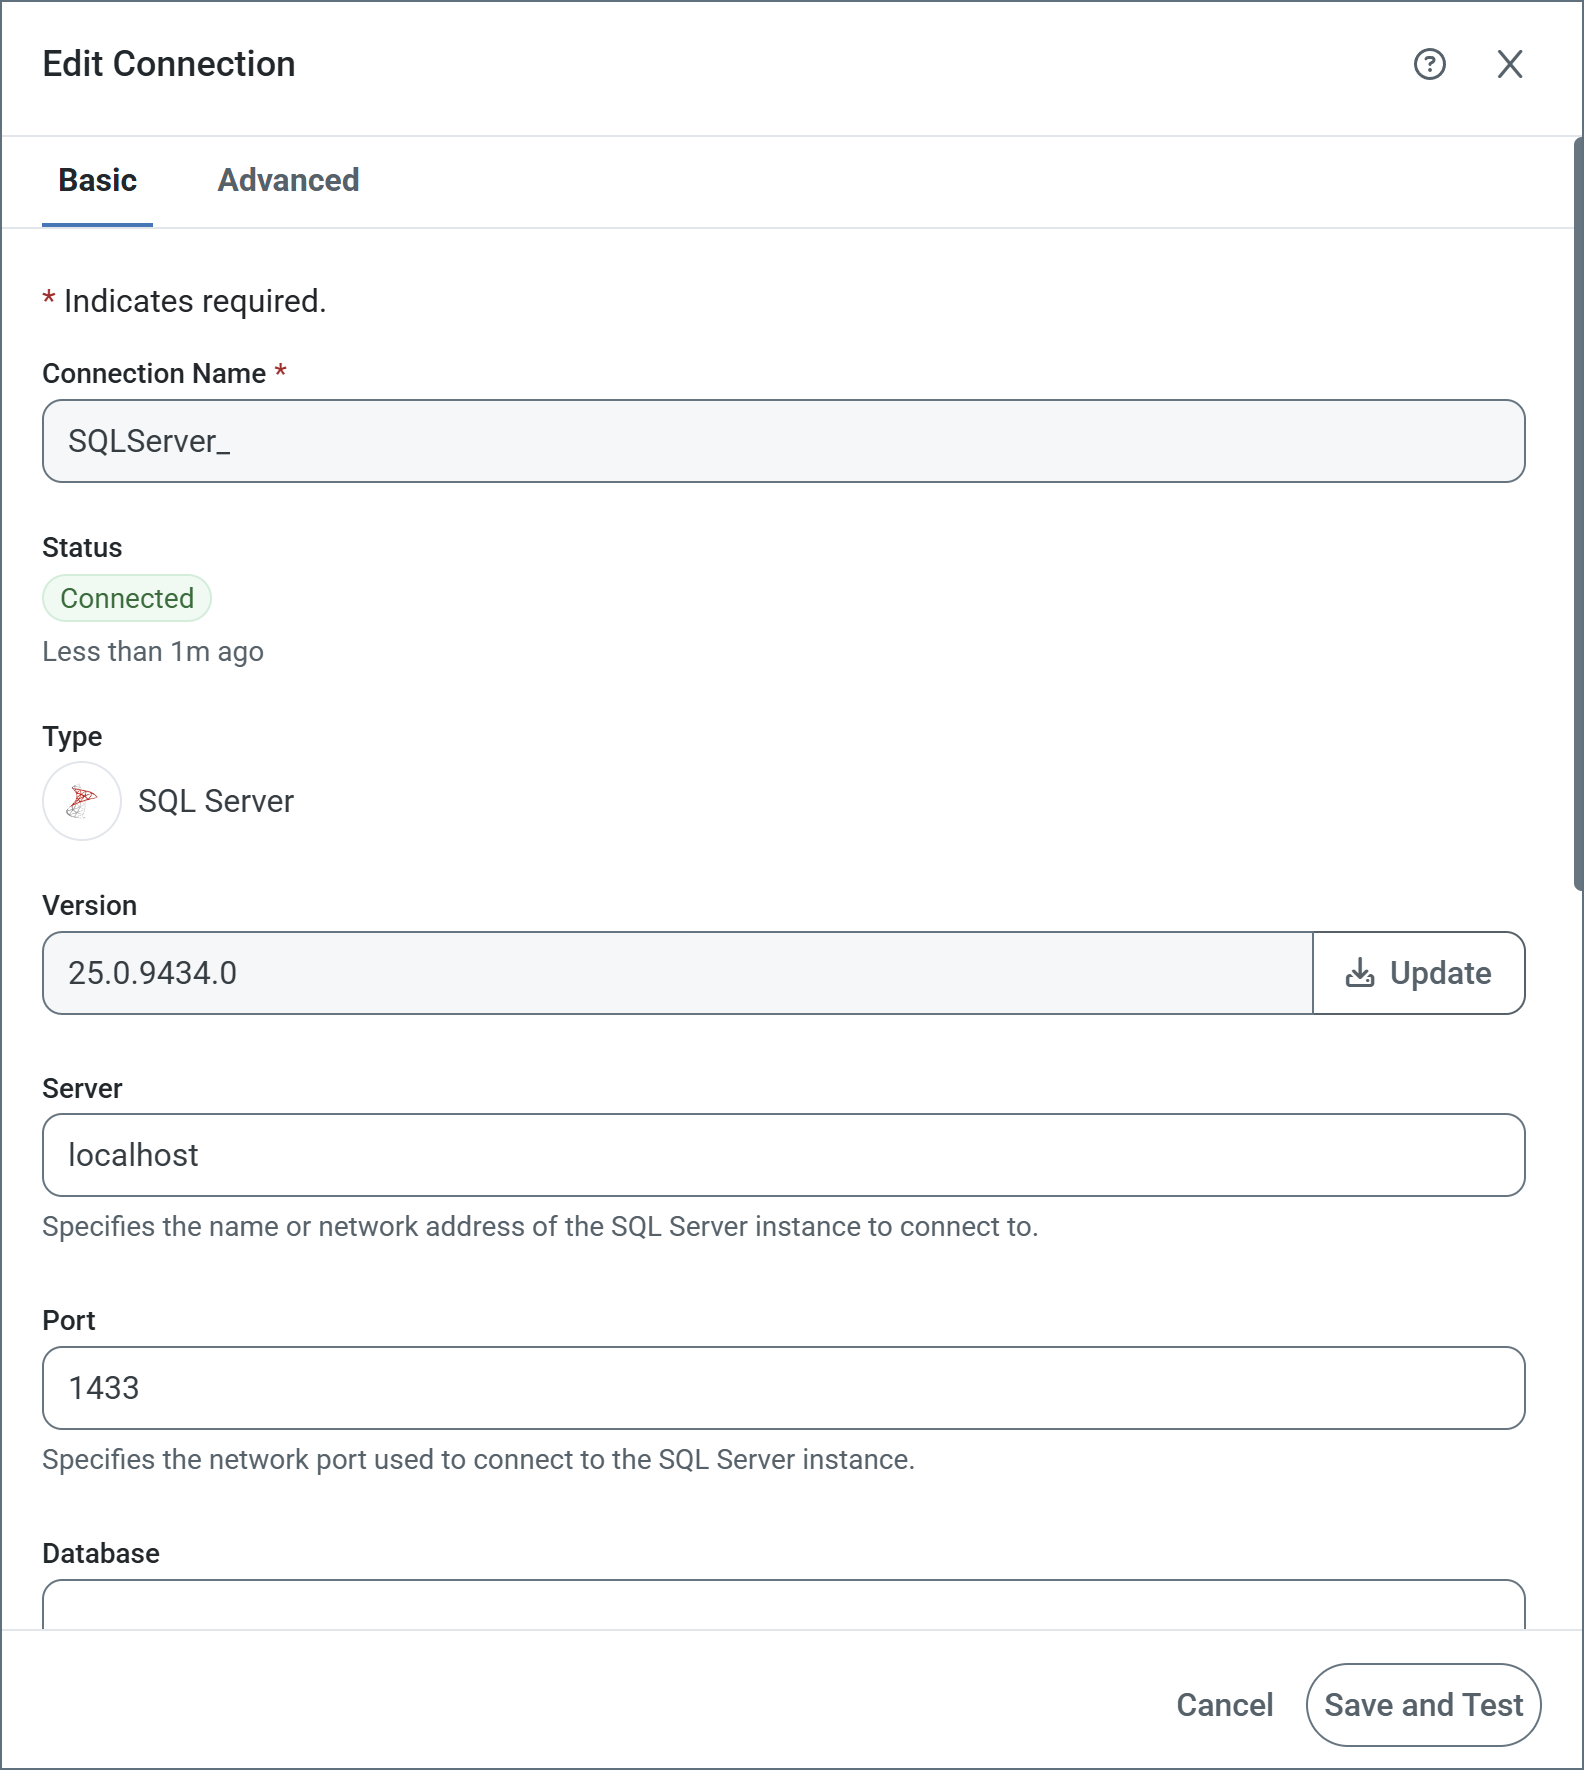
Once the installation is complete, or if you did not need to download and install the driver, you still need to provide the specific connection parameters. These vary by target, and might require OAuth redirection. Click Add and Test to save the connection. If the test fails, the connection is still saved, but you can continue to edit it to resolve any errors.
Once the shared connection is created, you can select it from the Connection dropdown in connectors that support shared connections.
Update Versions
Administrators can also use the Connections tab to update versions. You can update to a new version when one is available, or select a version that meets your needs. Do this by:
- Clicking Add Connection
- Editing an already configured connection by clicking the link to the connection name
When you use the Add Connection option, click the download button. This opens the Update Connector pane.
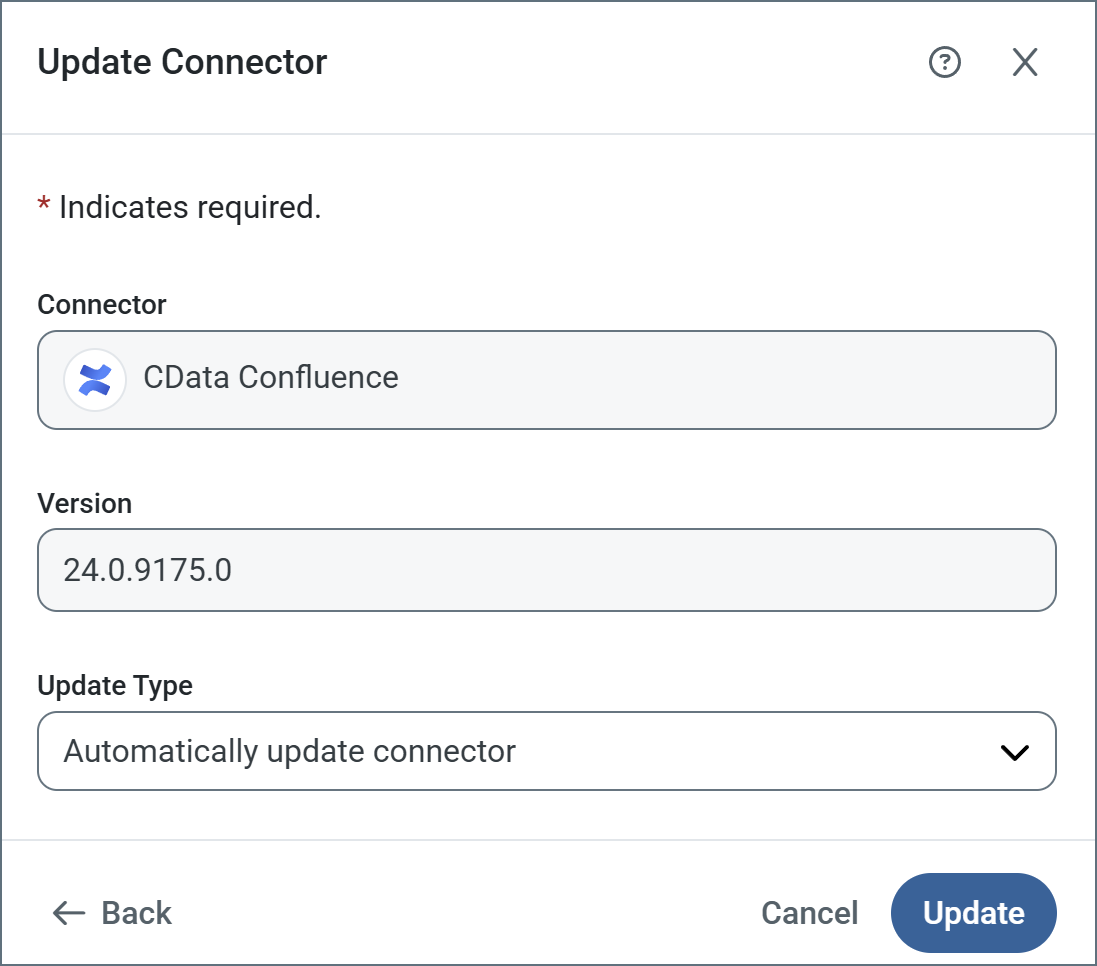
Choose the type of update you want from Update Type, then click Update. The options are:
- Automatically update connector.
- Manually update connector: If you use this option, use the File field to upload the
.zipfile to install. - Select from available versions (only appears if the currently installed version is not the latest, or if multiple versions are available): If you use this option, use the Update Version field to select the version to install.
When you edit an existing connection, update the driver using the Update button. Once clicked, the Update Connector pane opens with the same set of update options described above.