Upgrading Connect
Version 22.0.8486
Version 22.0.8486
Upgrading Connect
CData is always making improvements to our products. It is always recommended that you run the latest version of CData Connect to maximize performance, stability and compatibility with online services. This page outlines the best ways to update CData Connect based on your configuration.
Upgrading the Embedded Application or Service
If you run CData Connect using the embedded application or as a service, follow these steps to upgrade:
-
Stop the CData Connect application or service (see Starting the Server for more information).
-
Download the latest version of CData Connect.
-
Install the application.
-
For Windows, run the step file and install it to the existing directory.
-
For Linux, follow these steps to preserve your settings and drivers:
-
Extract the archive to a temporary directory. To do this, you can use this terminal command:
tar -zxvf CDataConnect.tar.gz -C Connect_temp/ -
Copy
Connect_temp/connect.jarto the base folder of your Connect installation directory and overwrite the existing file. -
Copy
Connect_temp/webapp/connect.warto thewebappfolder of your Connect installation directory and overwrite the existing file.
-
-
-
Start the application or service.
Upgrading the Java Connectors
In addition to the Connect application, CData regularly makes improvements to the underlying connectors.
Updating to the Latest Official Version
CData releases updates to connectors on a quarterly basis. To upgrade to the latest official release of a specific connector:
-
In the CData Connect admin console, open the Data Model page.
-
Select the Connections tab, and then click Add More.
-
Select the connector you wish to upgrade and click Download & Install.
-
Restart the Connect service for the update to take effect.
Updating to a Custom Driver Version
Sometimes, CData makes improvements to connectors between official quarterly releases. If one of your connectors receives such an update, CData may provide you with custom version of the driver. To update a driver to a custom version, follow these steps:
-
Download the driver file.
-
Launch the CData Connect admin console and open the Data Model page.
-
In the Available Sources section, click Add More.
-
Select your data source in the list.
-
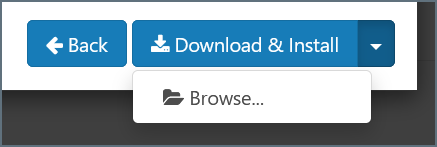
Click the drop-down arrow next to Download & Install and select Browse.

-
In the file upload dialogue, select the custom driver file and click Upload.
-
When the upload finishes, restart the Connect service.