DB2 (Native)
Version 26.2.9669
Version 26.2.9669
- Set Up DB2 for Change Data Capture
- Configure CDC for DB2 on Linux
- Configure CDC for DB2 on Microsoft Windows
- Step 1: Download the Required User-Defined Functions
- Step 2: Back Up the Database
- Step 3. Create Control Tables and Procedures That Add and Remove Tables from Capture Mode
- Step 4. Upgrade Control Tables for ARCH_LEVEL 1021 (only If You Use InfoSphere Data Replication 11.4.0)
- Step 5. Add Tables to Capture Mode
- Step 6. Start the ASN Capture Agent.
- Add the DB2 Connector
- Authenticate to DB2
- Complete Your Connection
DB2 (Native)
You can use the DB2 connector from the CData Sync application to capture data from DB2 and move it to any supported destination. To do so, you need to add the connector, authenticate to the connector, and complete your connection.
Set Up DB2 for Change Data Capture
Before you add and set up the DB2 source connector, you need to configure the DB2 database for change data capture (CDC), as explained in the following sections.
Before you set up DB2 for CDC, ensure that the following requirements are met. These requirements are for both Linux and Microsoft Windows operating environments.
- DB2 version 11.5 or later (DB2 12.1 is also supported).
- DB2 is installed and a DB2 instance is created on the host system.
- Sync CDC requires the DB2 SQL Replication libraries (Abstract Syntax Notation, ASN) to be installed and available on the DB2 system. These libraries are essential for operation and require an IBM InfoSphere Data Replication (IIDR) license. However, IIDR installation is not necessary.
- A recent full database backup must be available before starting the ASN capture agent.
- The tables that you want to replicate must be placed in ASN capture mode.
Configure CDC for DB2 on Linux
The following steps configure DB2 CDC in the Linux operating environment. Before you add your DB2 connector, enable change data capture (CDC) in the database and put your tables in capture mode, as follows:
Step 1. Log in to DB2
Log in to DB2 as the db2inst1 user.
Step 2. Start the ASN Capture Agent and Configure the Capture Schema and Tables
Enable (start) the ASN agent (capture program), create the schema where all captured table changes will be stored, and add the tables for which you want to capture changes, as follows. These steps are based on the DB2 portions of the IBM SQL Replication Guide and Reference.
-
Download the required SQL Replication User-Defined Function (UDF) from here and extract it to your DB2 server directory (for example,
$HOME/asncdctools/src).The DB2 server’s PATH environment variable contains the DB2 path to the
bldrtncommand (for example,export PATH=$PATH:/opt/ibm/db2/V11.5.0.0/samples/c/command appends the directory /opt/ibm/db2/V11.5.0.0/samples/c/ to the existing PATH variable). As a result, you can run thebldrtncommand from anywhere in your terminal without specifying the full path. Use this command to compile the UDFs, as shown below:cd $HOME/asncdctools/src bldrtn asncdc -
Ensure that the JDBC driver can read the DB2 metadata catalog by submitting the following commands:
# Replace the {...} placeholders as required cd $HOME/sqllib/bnd db2 connect to YourDatabaseName db2 bind db2schema.bnd blocking all grant public sqlerror continue -
Ensure that the database was recently backed up. The ASN agents must have a recent starting point from which to read. If you need to perform a backup, run the following commands:
db2 backup db YourDatabaseName to YourBackupLocation
db2 restart db YourDatabaseName
These commands trim (prune) the data so that only the most recent version is available. If you do not need to retain older versions of the data, specify
dev/nullfor the backup location. -
Connect to your DB2 database to install the UDFs. Log in as the db2inst1 user and execute the following commands:
db2 connect to YourDatabaseName cp $HOME/asncdctools/src/asncdc $HOME/sqllib/function chmod 777 $HOME/sqllib/function -
Enable the functions that will start and stop the ASN capture agent.
db2 -tvmf $HOME/asncdctools/src/asncdc_UDF.sql -
Create the ASN control tables.
db2 -tvmf $HOME/asncdctools/src/asncdctables.sql -
Create the functions that will be used to add control tables to or remove them from capture mode.
db2 -tvmf $HOME/asncdctools/src/asncdcaddremove.sql
Step 3. Create a Connection with Your Database
Submit the following statements to create a connection with your database, enable the DB2 ASN capture agent, and add tables for capture mode.
  -- start the ASN agent
VALUES ASNCDC.ASNCDCSERVICES('start','asncdc');

  -- add a table to capture mode
CALL ASNCDC.ADDTABLE('SchemaName', 'TableName');
CALL ASNCDC.ADDTABLE('DB2INST1', 'TEST_TABLE');

----------------------------------------------------
   -- Other commands that you can use:
   -- Reinitiate or stop the ASN agent
VALUES ASNCDC.ASNCDCSERVICES('reinit','asncdc');
VALUES ASNCDC.ASNCDCSERVICES('stop','asncdc');
   -- check the status of the ASN agent
VALUES ASNCDC.ASNCDCSERVICES('status','asncdc');
   -- remove a table from the change data capture mode:
CALL ASNCDC.REMOVETABLE('SchemaName', 'TableName');
After all the prerequisite steps complete successfully, continue to the Add the DB2 Connector section. For details about using CDC, see Using the Sync CDC Engine.
Configure CDC for DB2 on Microsoft Windows
The steps in this section configure DB2 CDC on Microsoft Windows by using the ASN Capture Agent (asncap.exe). These steps were validated with DB2 Community Edition 12.1.
Before you perform the steps, ensure that the following requirements (Windows specific) are met.
Before you configure CDC on Windows:
-
Install DB2 on Windows and a DB2 instance is created.
-
Add the ASN binaries to the DB2 installation directory, as shown below:
<DB2_InstallationDirectory>\IBM\SQLLIB\BIN\asncap.exe <DB2_InstallationDirectory>\IBM\SQLLIB\BIN\asnccmd.exe -
Ensure that a Windows user account (local or domain) with a non-blank password is available for Sync to connect to DB2.
Step 1: Download the Required User-Defined Functions
Download the required SQL Replication User-Defined Function (UDF) package from here and extract it to a directory on the DB2 server, as shown in this example:
C:\asncdctools\src
Note: The UDF package includes files such as asncdc.c and asncdc_UDF.sql, which are used on Linux to create SQL-callable functions for starting and stopping the ASN capture agent. On Windows, the capture agent is managed using the asncap.exe command-line utility or Windows Task Scheduler instead of SQL-callable start and stop functions.
Step 2: Back Up the Database
The ASN agents must have a recent starting point from which to read. To back up the database, open the DB2 Command Window - Administrator via the Windows Start menu and submit the following commands:
db2 connect to YourDatabaseName
db2 backup db YourDatabaseName to YourBackupLocation
db2 restart db YourDatabaseName
Step 3. Create Control Tables and Procedures That Add and Remove Tables from Capture Mode
Submit the following commands to create the ASN control tables and procedures that add and remove tables from capture mode:
db2 connect to YourDatabaseName
db2 -tvf C:\asncdctools\src\asncdctables.sql
db2 -tvf C:\asncdctools\src\asncdcaddremove.sql
Note: In the statements above, replace C:\asncdctools\src with the actual directory path to which you saved the user-defined functions, if they are located elsewhere.
Step 4. Upgrade Control Tables for ARCH_LEVEL 1021 (only If You Use InfoSphere Data Replication 11.4.0)
If you use InfoSphere Data Replication 11.4.0, you must upgrade your control tables for ARCH-LEVEL 1021 (a specific architecture level in IBM InfoSphere Data Replication). Because later versions include columns that are not present in the scripts that were provided earlier in step 1, starting the capture agent can produce missing column errors, such as shown in the following example:

In such cases, IBM provides guidance in SQL Replication – Migrating to ARCH_LEVEL 1021 on Linux, UNIX, and Windows and includes the required update scripts with the DB2 installation. You can find the script in the following directory:
<YourDB2InstallationDirectory>\SQLLIB\samples\repl\mig1021\sql\asncapluwv1021.sql
The bundled script contains placeholders for !capschema! and !captablespace!. Update the script by replacing !capschema! with ASNCDC. For !captablespace!, you can either remove all references so that the default tablespace is used or replace it with the name of the tablespace where the SQL capture control tables are created.
Save a copy of the edited script in the same directory where you downloaded the UDFs. Then, submit the following command to update the control tables:
db2 -tvmf C:\asncdctools\src\asncapluwv1021.sql
Step 5. Add Tables to Capture Mode
Add tables to capture mode by using the ADDTABLE('schema', 'table') function, as shown below:
db2 connect to YourDatabase

CALL ASNCDC.ADDTABLE('SchemaName', 'TableName');
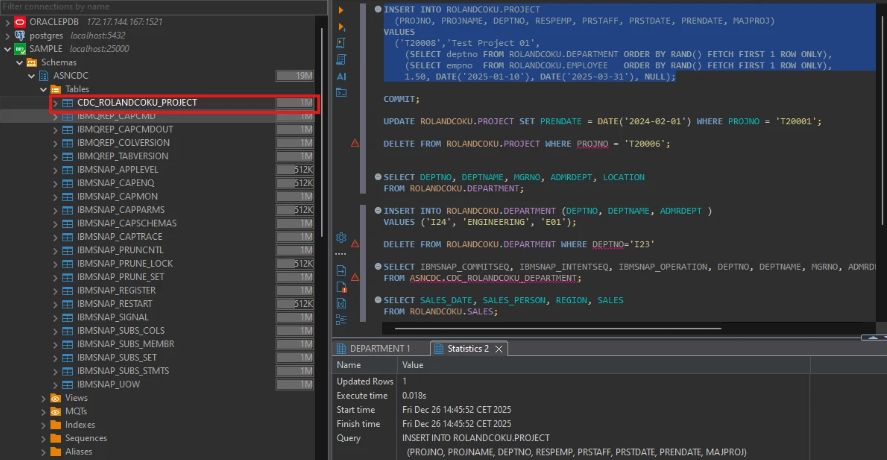
The control tables and metadata are created in the ASNCDC schema, as shown in this example:
Step 6. Start the ASN Capture Agent.
Start the ASN capture agent. You can run the capture agent either in the foreground or in the background (recommended method). Both methods are explained below.
Run the ASN Capture Agent in the Foreground
Submit the following command in the DB2 Command Window - Administrator:
asncap capture_schema=ASNCDC capture_server=YourDatabase
This command starts the agent process on the terminal, and it logs the status, as shown below:

If the command window closes, the ASN capture agent process terminates.
(Recommended) Run the ASN Capture Agent in the Background
Because running the ASN capture agent from the command line terminates the agent when the command window is closed, it is a best practice to use the Windows Task Scheduler to run the agent in the background, as follows:
-
Create a directory where the replication service can write operation logs (for example,
C:\ASNCDC\capture_files\). -
Open the Windows Task Scheduler and select Create Task in the right pane.
-
On the General tab, specify these settings:
-
Name: Supply a name for the task (for example, ASNCDC Capture).
-
Security options:
- Click Change User or Group.
- Enter the Windows user that has rights to create tasks and connect to the database. Then, select Check Names > OK.
- Select Run whether user is logged on or not.
- Select the Run with highest privilege checkbox.
- (Optional) Select the Hidden checkbox if you do not want to see the UI.
-
-
On the Triggers tab, click New and specify these settings:
-
Begin the task: Select At startup.
-
Enabled: Select this checkbox. Then, click OK.
-
-
On the Actions tab, click New and specify these settings:
-
Action: Select Start a program.
-
Program/script: Enter this path:
<YourDB2InstallationDirectory>\IBM\SQLLIB\BIN\db2cmd.exe. -
Add arguments: Add the following arguments:
/c /w "asncap capture_schema=ASNCDC capture_server=YourDatabaseName capture_path=C:\ASNCDC\capture_files" -
Start in: Enter the path
C:\ASNCDC\capture_files.
-
-
Click Save to save your settings.
-
Right-click the task and select Run.
-
Verify that the agent is running by submitting this command:
tasklist | findstr /i asncap.exe
After all the prerequisite steps complete successfully, continue to the Add the DB2 Connector section. For details about using CDC, see Using the Sync CDC Engine.
Add the DB2 Connector
To enable Sync to use data from DB2, you first must add the connector, as follows:
-
Open the Connections page of the Sync dashboard.
-
Click Add Connection to open the Select Connectors page.
-
Click the Sources tab and locate the DB2 (Native) row.
-
Click the Configure Connection icon at the end of that row to open the New Connection page. This action opens the Add Connection dialog box.
Note: If the Configure Connection icon is not available, click the Download Connector icon to install the DB2 (Native) connector.
-
Enter a name for your connection in the Add Connection dialog box.
-
Click Add to open the Settings tab for your connector.
For more information about installing new connectors, see Connections.
Authenticate to DB2
After you add the connector, you need to set the required properties.
-
Server: Enter the address or host name of the DB2 (Native) server. The default server is localhost.
-
Port: Enter the port on which your DB2 server is listening. The default port is 50000.
-
Database: Enter the name of your DB2 (Native) database.
-
User: Enter the username that you use to authenticate to the DB2 (Native) database.
-
Password: Enter the password that you use to authenticate to the DB2 (Native) database.
Complete Your Connection
To complete your connection:
-
Define advanced connection settings on the Advanced tab. (In most cases, though, you should not need these settings.)
-
Click Create & Test to create your connection.