Users
Version 25.3.9411
Version 25.3.9411
Users
By default, CData API Server uses token-based authentication to control per-user access to the API. As an alternative, you can provide Microsoft Windows user credentials to authenticate to the APIs. The first time that you launch API Server, the application prompts you to create the first application user (with username and password credentials).
Note: The first user that you create defaults to the Admin role because this role has full control over the application.
Understanding the Users Page
You can view a table of all your user accounts (or, users) from the Users tab in the API Server navigation pane. The table on this page summarizes your users and enables you to manage those accounts from one access point.
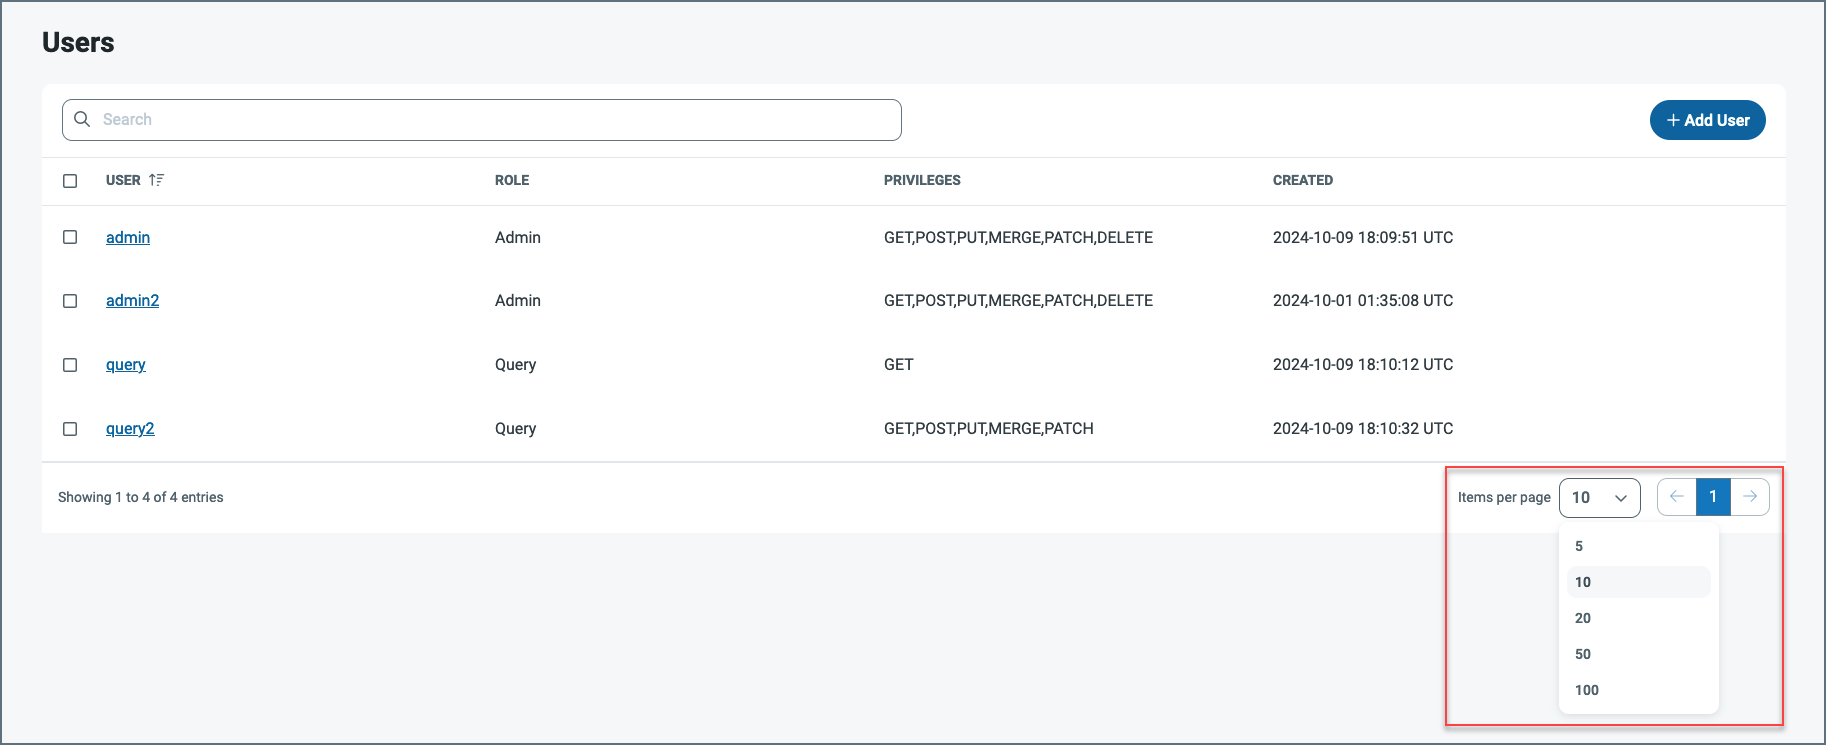
The users are displayed in rows, with columns that provide details about each user. As shown above, you can specify the number of rows that you want to display on the page by selecting a number from the Items per page list at the bottom of the page.
API Server provides these details about your user accounts:
-
NAME - Lists the user name.
-
ROLE - Lists the role assigned to the user (either Admin or Query).
-
PRIVILEGES - Lists the privileges that each role is assigned. Available privileges are GET, POST, PUT, MERGE, PATCH, and DELETE.
-
CREATED - Displays the date and time that a user account is created. The date and time are in the format YYYY-MM-DD HH:MM:SS (UTC time).
If you click a user name, API Server opens the Edit User page where you can make changes to the user settings.
If you click the checkbox to the left of a username, you can delete the user or deselect the checkbox, as shown below.
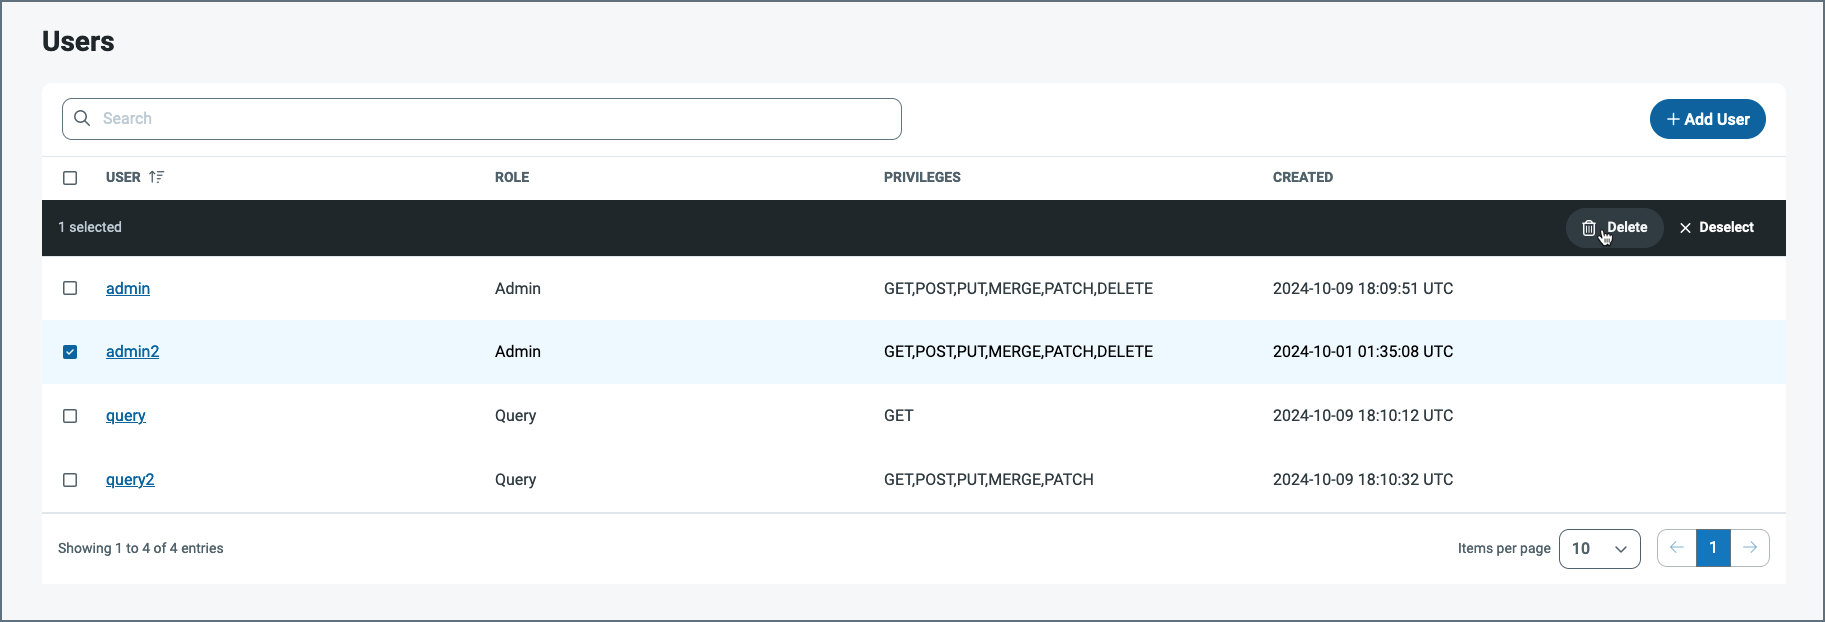
To select the entire list of users for deletion, select the checkbox to the left of the NAME column header.
You can organize your connections table in ascending or descending order on the NAME column. To order the columns, simply click the up (▲) and down (▼) arrows that are to the rightn of NAME.
You can organize your user list in ascending or descending order by the NAME column. To order the columns, simply click the up (▲) and down (▼) arrows next to the NAME column.
Adding a User
To add a user:
-
Click the Users tab in the navigation pane to open the Users page.
-
Click Add User to open the Add User dialog box.
-
Enter a username and password.
-
Select the role for the user:
-
Admin: The Admin role provides full control over the application. An Admin user can create new connections, change application settings, and perform every other operation supported by the console. Only Admin users have permission to manage other users. Admin users can create, delete, and modify users.
-
Query: The Query role can issue queries to established connections. However, it cannot access administrative functions, including creating connections and managing users.
-
-
(Optional) Enter the number of requests that the user can make per hour. Set this option to -1 to give a user unlimited access. If you do not specify a number, the application uses the default number (1000).
-
(Optional) Enter the maximum number of concurrent requests that a user can make. Set this option to -1 to give a user unlimited access. If you do not specify a number, the application uses the default number (10).
-
Select the privileges for the account. You can select any or all privileges.
-
GET: This privilege enables the user to PUT method to retrieve data from the server by using the HTTP PUT method.
-
POST: The privilege enables the user to send data to the server by using the HTTP POST method.
-
PUT, MERGE, PATCH: - This privilege enables the user to use all three of the following HTTP methods:
-
The PUT method enables the user to update an existing resource. When you use this method, the request body contains a complete new version of the resource, including any updates.
-
The PATCH method also enables the user to update an existing resource. However, this method differs from PUT in that the request body contains only the specific changes.
-
The MERGE method enables the user to update selectively specific portions of a resource by merging data into it.
-
-
DELETE: This privilege enables the user to delete a resource by using the HTTP DELETE method.
-
-
Click Add User to create the user and close the dialog box. Once the dialog box closes, the new user appears in the Users table.
Note: These user-specific settings override the server-wide rate-limit settings.
Managing User Settings
From the Users table, you can edit user settings or delete a user by clicking the options at the end of a user row.
Note: To see the options, you must hover your cursor over the end of the row.
-
To edit your user settings (including the user password), click the Edit icon (
 ) to open the Edit User page, where you can change any of the current settings.
 -
To remove a user account permanently, click the Delete icon (
 ).
).
Resetting User Passwords
As explained earlier in Managing User Settings, the administrator can reset the password by editing the account settings.
In the event that an administrator is locked out of API Server, the embedded web server provides the ability to reset an administrator’s password to regain access to the application.
To reset the password in API Server, submit the following command:
java -jar apiserver.jar -ResetPassword -User <user> -Password <password> -AppDirectory <AppDirectory>
Saving User Information to Other Databases
API Server stores user information in a Derby database, by default. You can also save user information to the database of your choice. For details, see the documentation for the server on which you host API Server.
Authenticating with an Authorization (Auth) Token
You can connect with HTTP authentication by providing an auth token. For example, to use HTTP Basic authentication, set the username in the User header and the user’s corresponding auth token in the Password header.
Accessing the CData API Server API
Each user can be granted an auth token that enables access to the API Server API. For more information about authenticating against the API, see Authentication.