Creating an Entra ID (Azure AD) Application
Creating an Entra ID (Azure AD) Application
Note: Microsoft has rebranded Azure AD as Entra ID. In topics that require the user to interact with the Entra ID Admin site, we use the same names Microsoft does. However, there are still CData connection properties whose names or values reference "Azure AD".
Microsoft Dynamics 365 supports OAuth-based authentication using Microsoft Entra ID. If you will connect via a web application and want to authenticate via Entra ID, you must first register a custom OAuth application in the Entra Admin Center, as described below.
If you will connect via a desktop application or headless machine, you can authenticate using Microsoft Dynamics 365's built-in embedded application credentials, which use CData branding. However, custom OAuth applications are also compatible with desktop and headless authentication flows, and may be preferable for production deployments or environments requiring strict policy control.
Registering the Application
To register an OAuth application in Microsoft Entra ID, follow these steps:
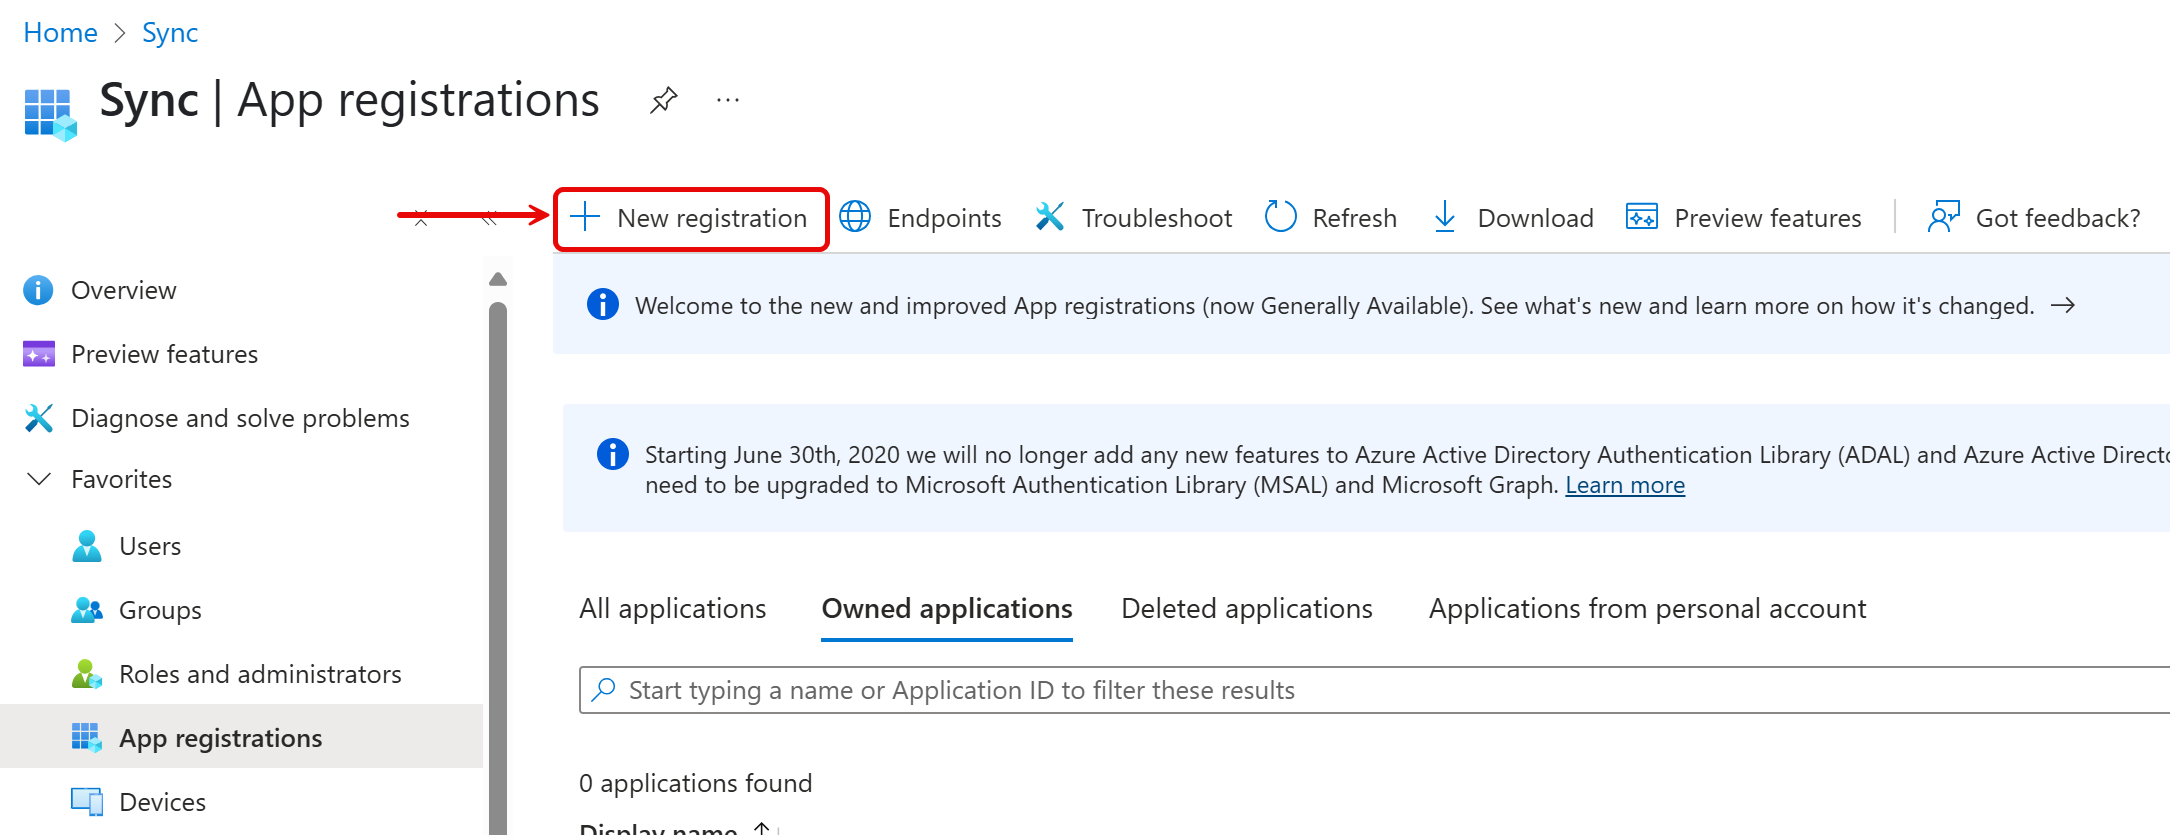
- Go to https://portal.azure.com.
- In the left-hand navigation pane, select Microsoft Entra ID > App registrations.
- Click New registration.
- Enter a name for the application.
- Specify the types of accounts this application should support:
- For private-use applications, select Accounts in this organization directory only.
- For distributed applications, select one of the multi-tenant options.
Note: If you select Accounts in this organizational directory only, when you connect with CData Python Connector for Microsoft Dynamics 365, you must set AzureTenant to the tenant's ID (either GUID or verified domain). Otherwise, authentication will fail.
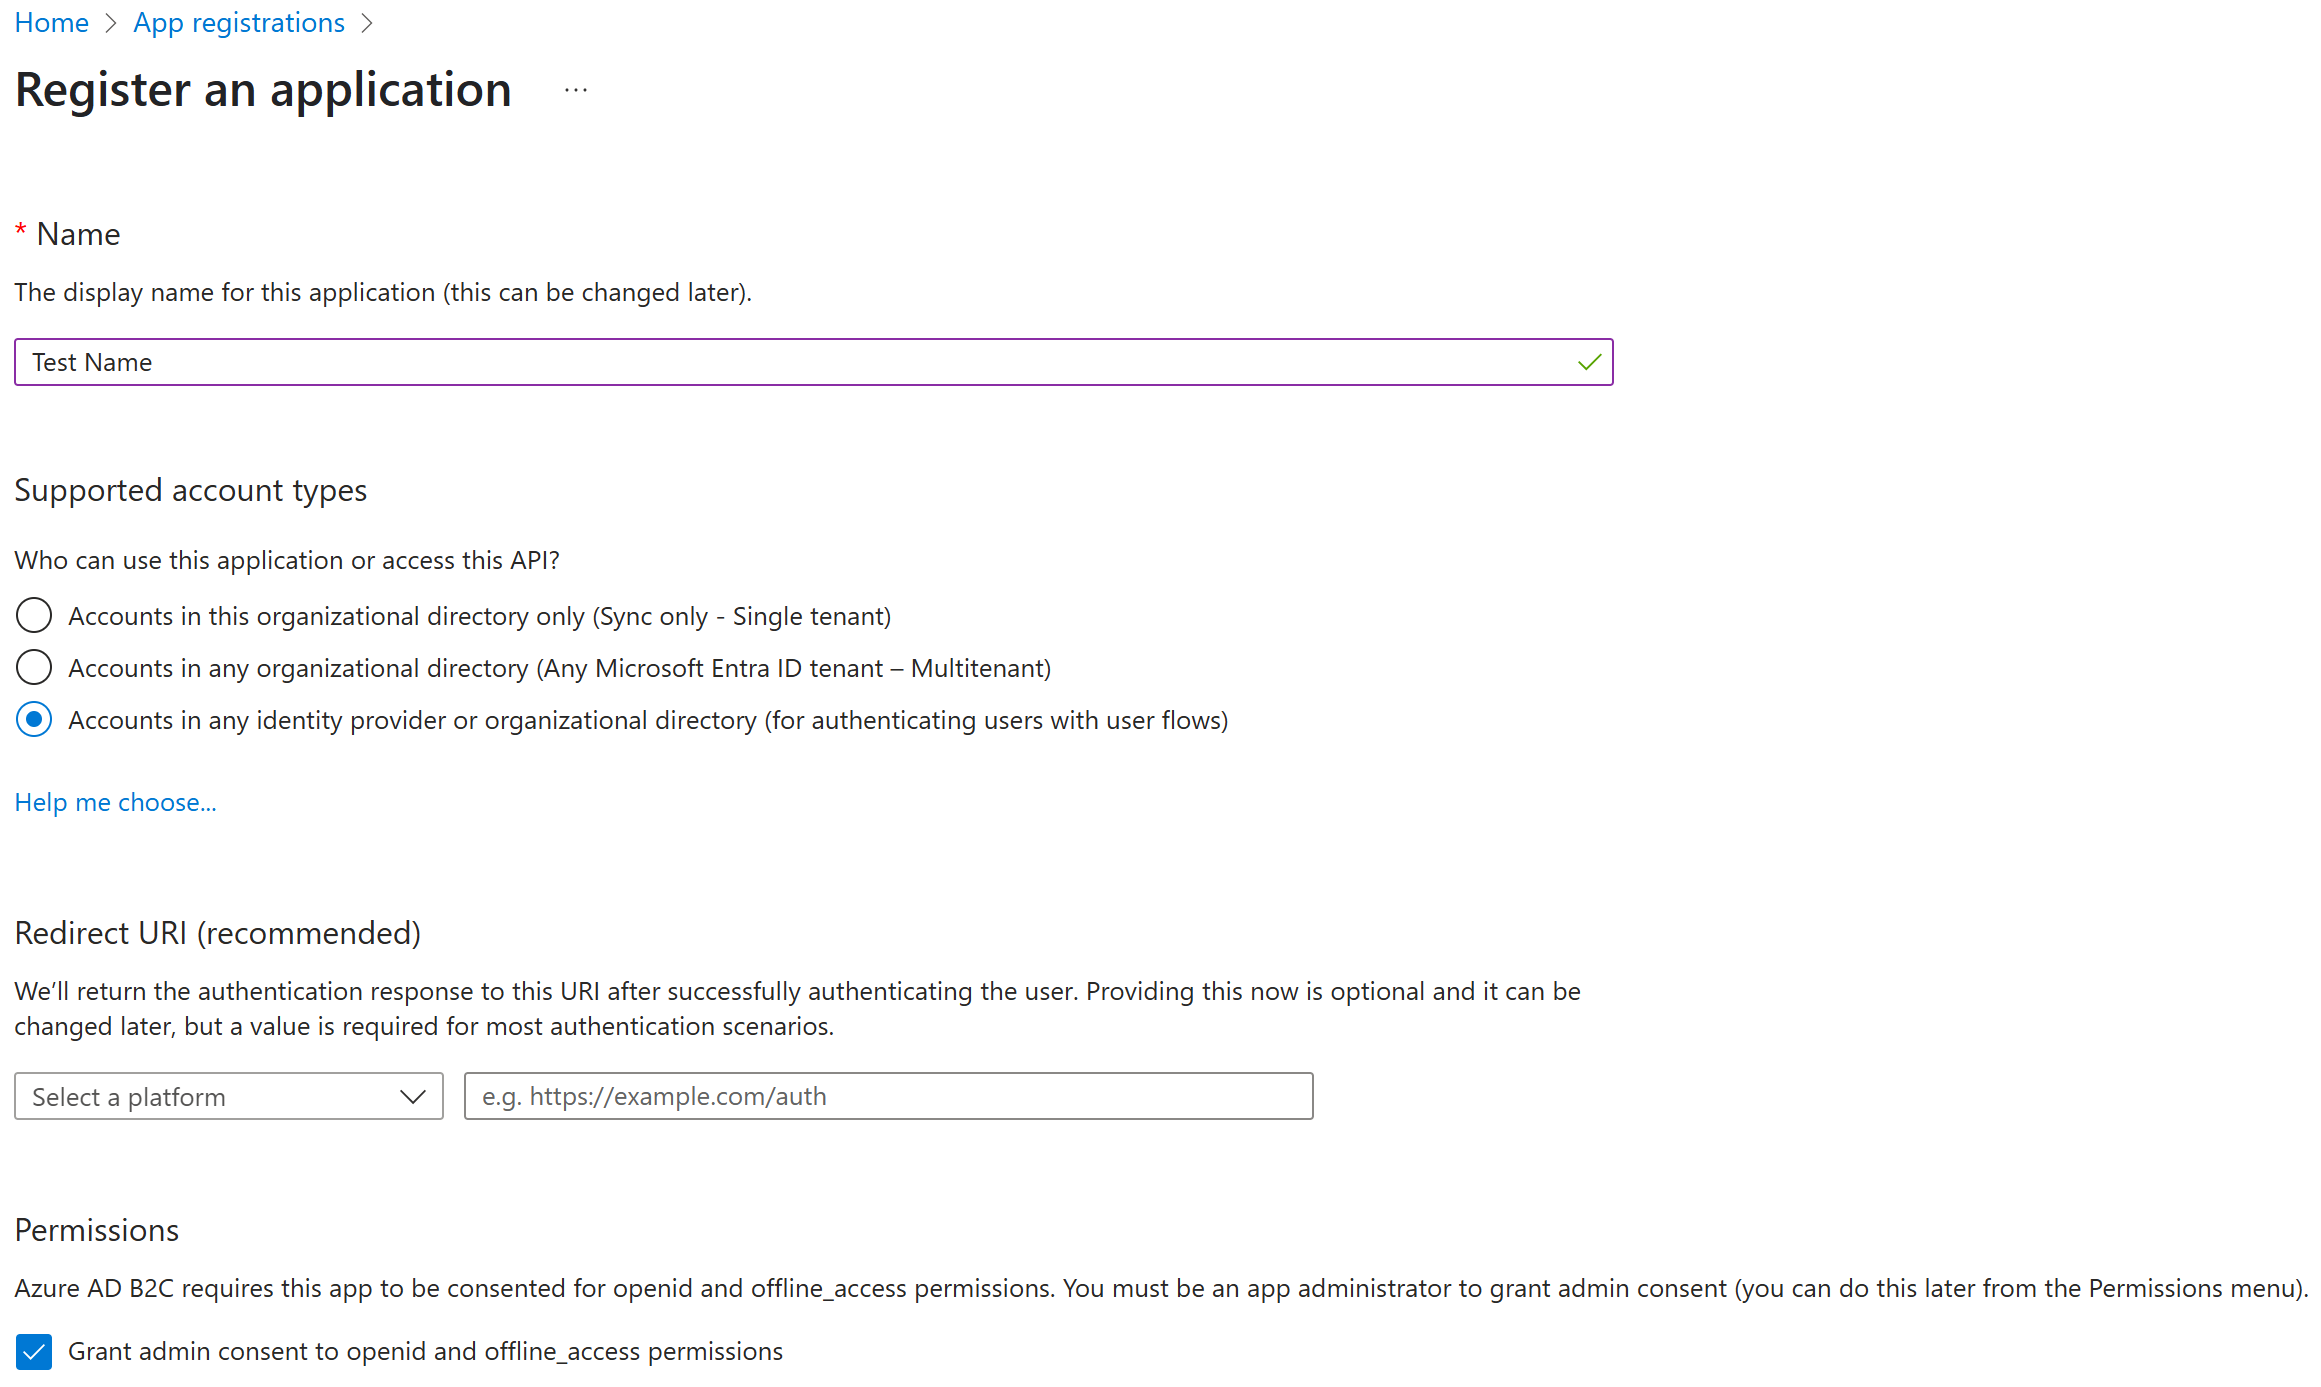
- Set Select a platform to Web, and set the redirect URI to http://localhost:33333 (default), or use another URI appropriate for your deployment. When using a custom redirect URI set a CallbackURL connection property; in those cases, set it to match this URI exactly.
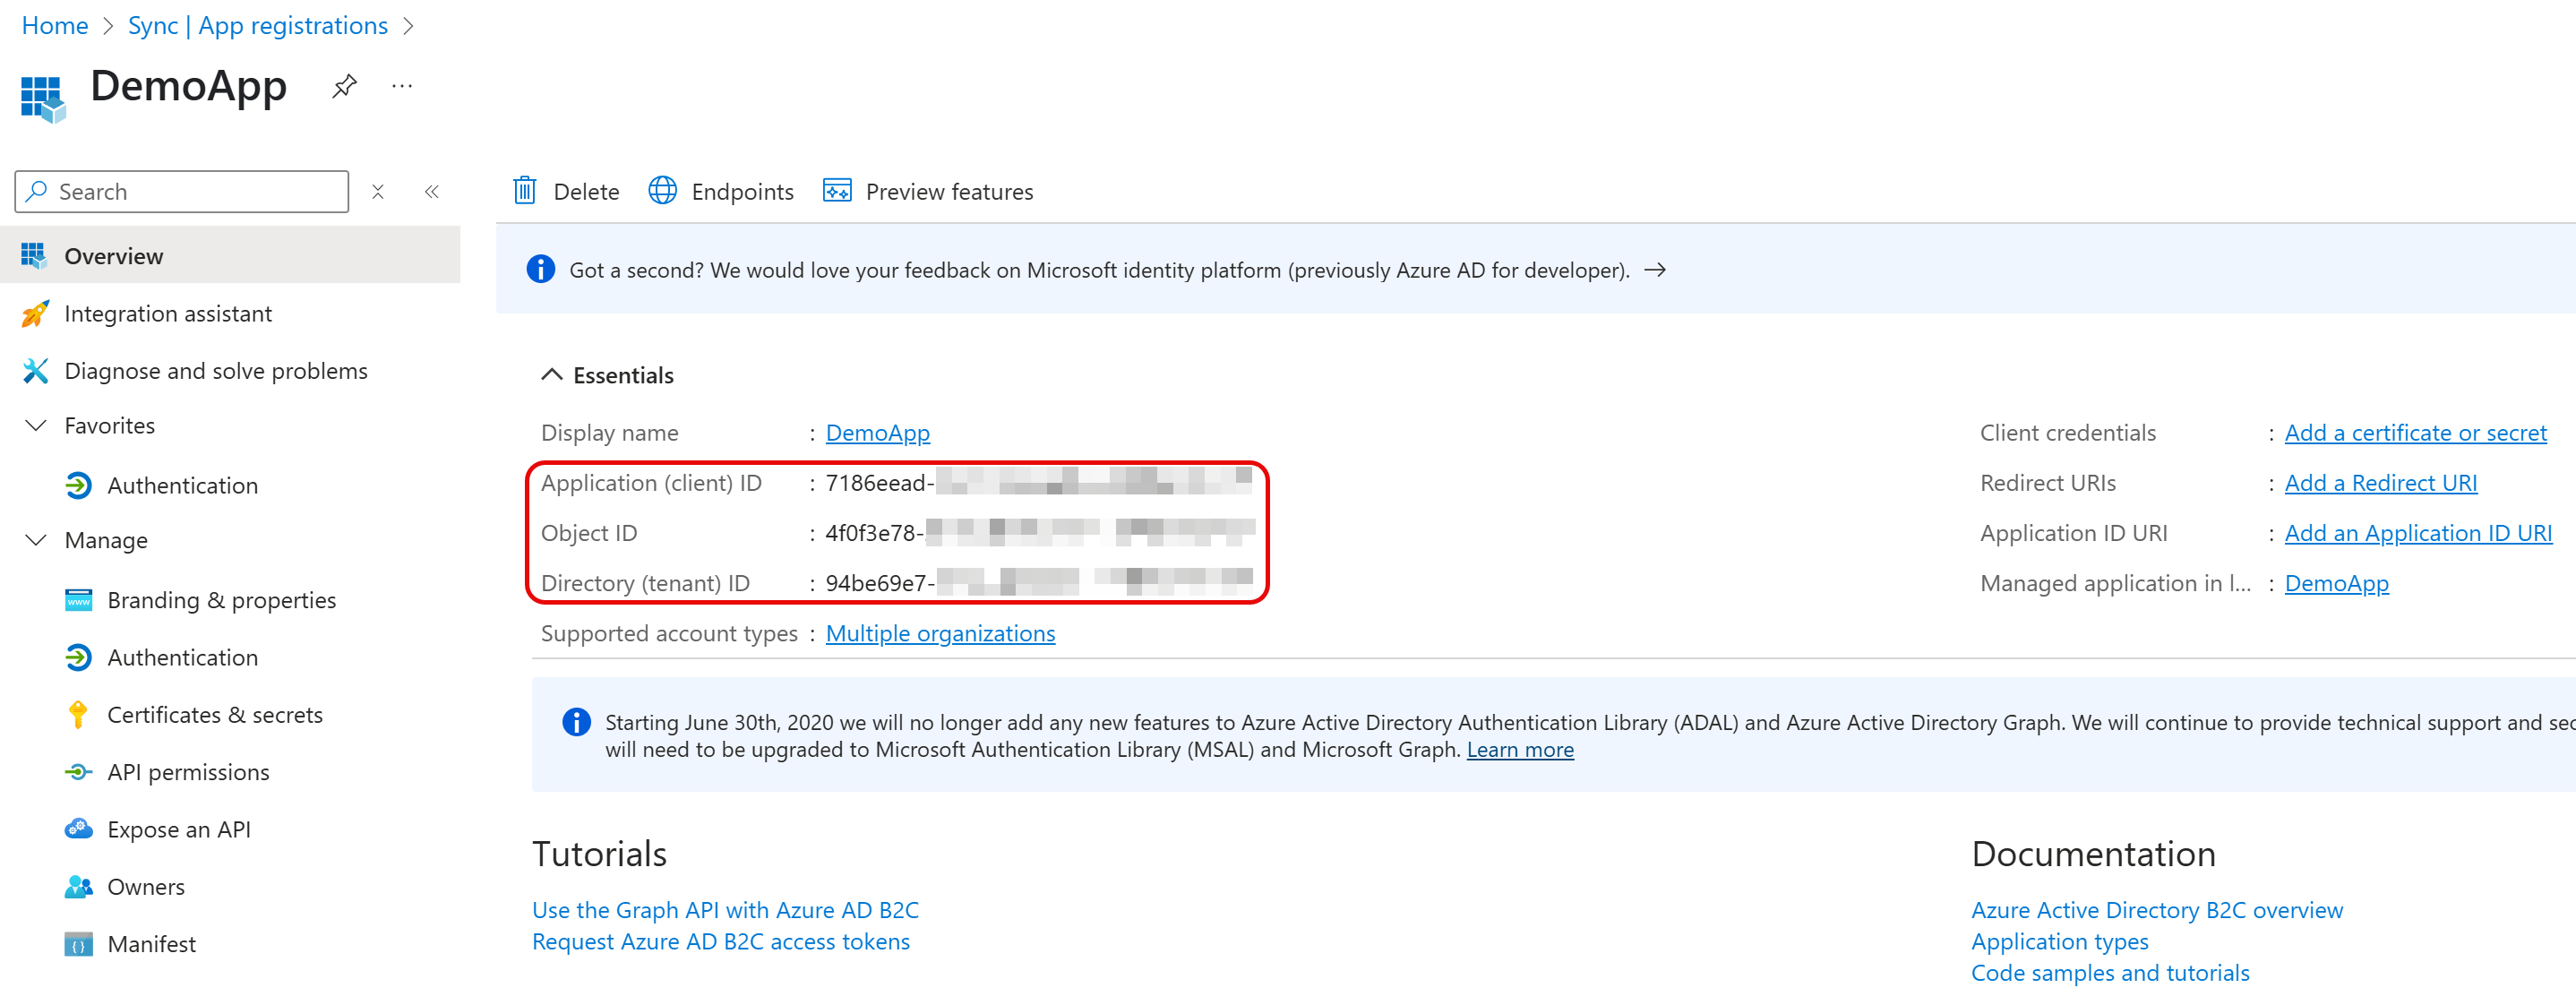
- Click Register. The application management screen opens.
Record these values for later use:
- Application (client) ID is used for OAuthClientId
- Directory (tenant) ID is used for AzureTenant
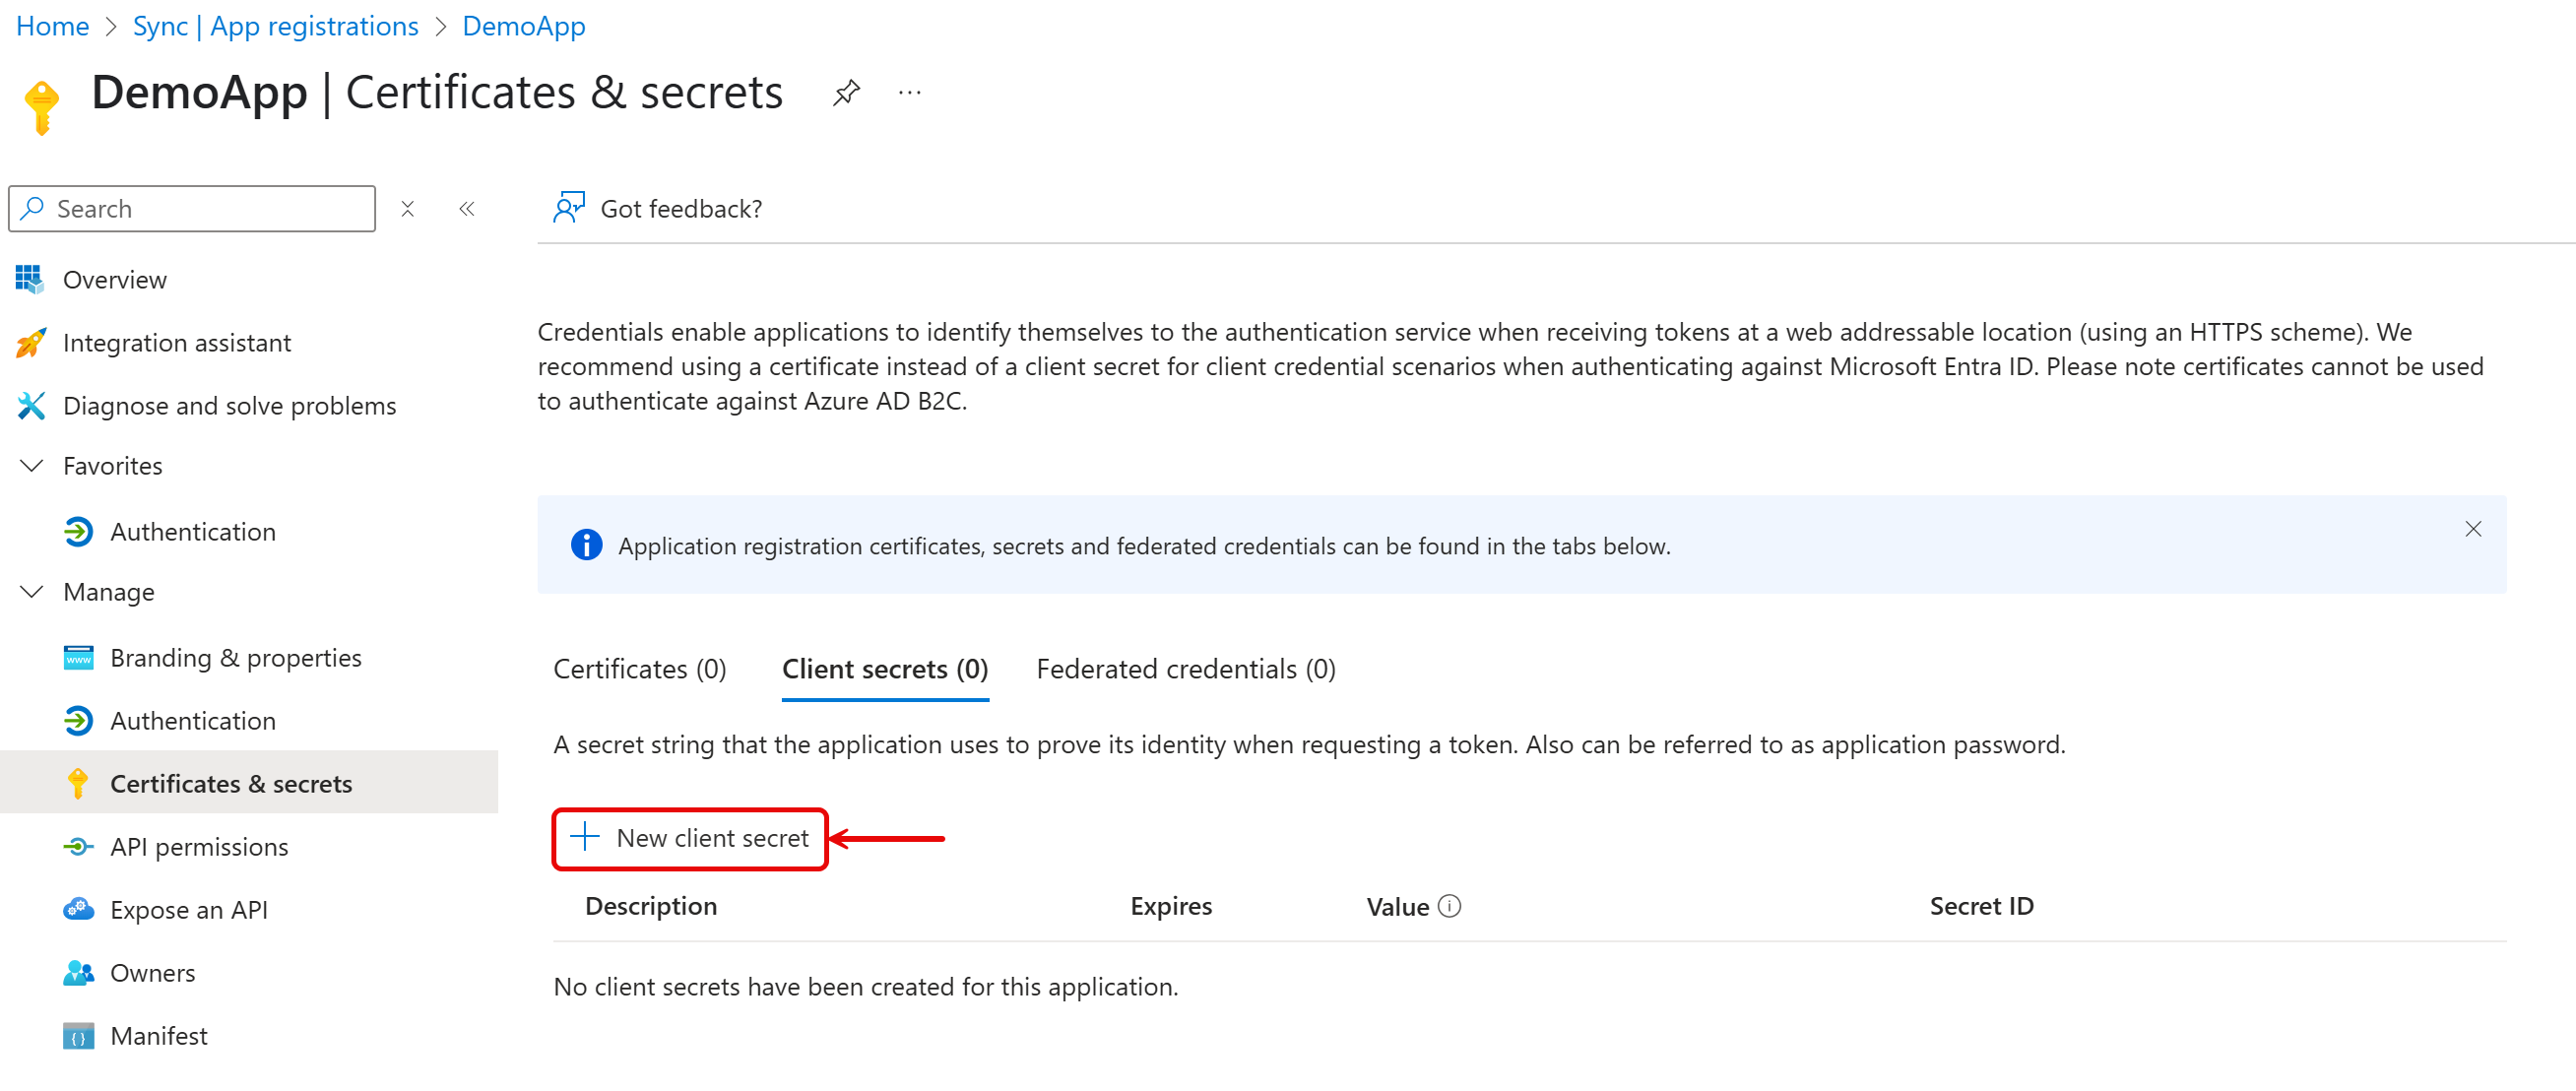
- Go to Certificates & Secrets. Click New Client Secret, set the desired expiration, and save the generated value.
This value will only be shown once — record it to use with OAuthClientSecret.
- Select Required Permissions > Add. Under Select an API, select Dynamics ERP > Delegated Permissions for OAuthGrantType = CODE (default).
- To confirm, click Add permissions.