Creating a Custom OAuth Application
Creating a Custom OAuth Application
CData embeds OAuth Application Credentials with CData branding that can be used in NetSuite SuiteTalk when connecting to NetSuite via a desktop application or a headless machine. If you want to use the embedded OAuth application, all you need to do to connect is to:- set AuthScheme to OAuth,
- get and set the OAuthAccessToken, and
- set the necessary configuration parameters.
(For information on getting and setting the OAuthAccessToken and other configuration parameters, see the Desktop Authentication section of "Creating the Data Source Name".)
However, you must create a custom OAuth application to connect to NetSuite via the Web. And since custom OAuth applications seamlessly support all three commonly-used auth flows, you might want to create custom OAuth applications (use your own OAuth Application Credentials) for those auth flows anyway.
Custom OAuth applications are useful if you want to:
- control branding of the authentication dialog;
- control the redirect URI that the application redirects the user to after the user authenticates; or
- customize the permissions that you are requesting from the user.
Procedure
- In the NetSuite Navigation Menu, hover your mouse over Setup > Integration > Manage Integrations and click New. This brings you to the Integration page.
- For OAuth 1.0 support (TBA), under Authentication > Token-based Authentication enable both Token-Based Authentication and TBA: Authorization Flow.
For OAuth 2.0 support, select Authorization Code Grant, Restlets, and Rest Web Services.
- Set a Callback URL for your application:
- For Desktop, set the Callback URL to https://localhost:portnumber and set CallbackURL to match. You can specify any port available.
- For Web, set the Callback URL to a page on your website where you would like the user to be returned after the user grants permissions to your app.
- For Headless machines, set a Callback URL in the format https://localhost:portnumber. You can specify any port available.
- Scroll down and click the blue Save button. A read-only version of the page is then loaded.
- Scroll down to Authentication > Client Credentials. The CONSUMER KEY and CONSUMER SECRET are displayed. Record these values for use in the OAuthClientId and OAuthClientSecret connection properties.
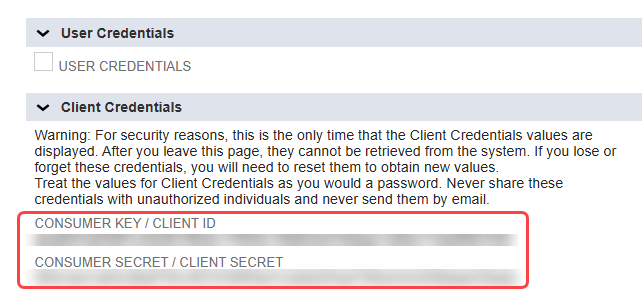
- Note: The consumer key and client secret only display once, immediately after creating the integration. If you return to this page, these values are no longer displayed.